
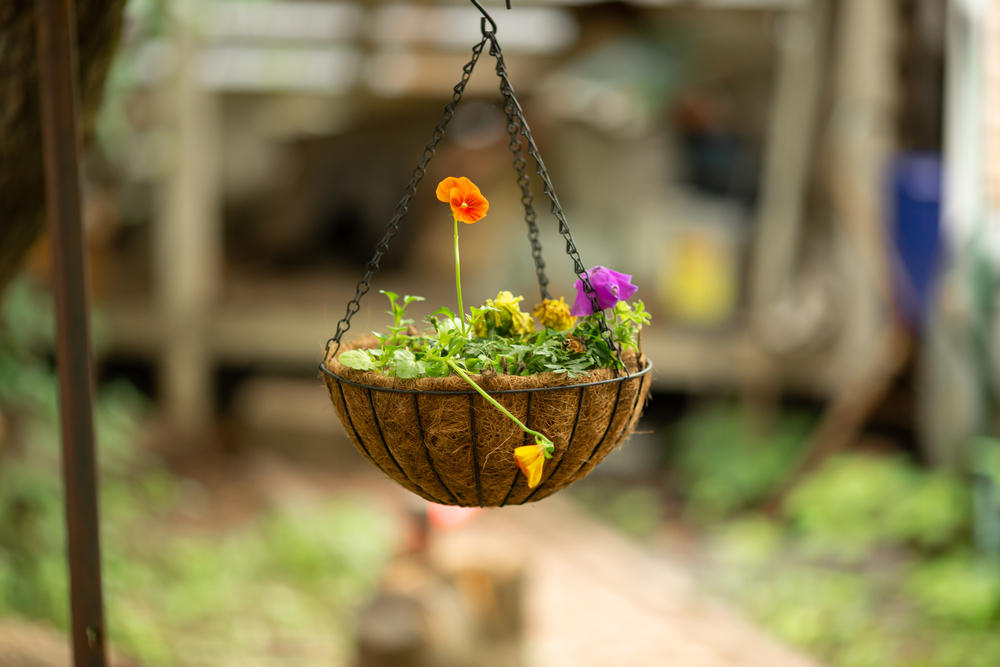
Are you looking for a way to showcase your indoor plants? Well, hanging plants are the best solution for adding a greenery look to every cranny and nook of your house or garden.
The plants can also serve as more than just an attractive display. Moreover, they are ideal for modern small living spaces since they can be hung on the wall or ceiling, freeing up the floor area. With that in mind, let’s take a look at how to make hanging planters.
DIY Hanging Planter Ideas
Here are some easy-to-follow crafts that can be used to make a DIY hanging planter.
How to Make a Macrame Hanging Planter
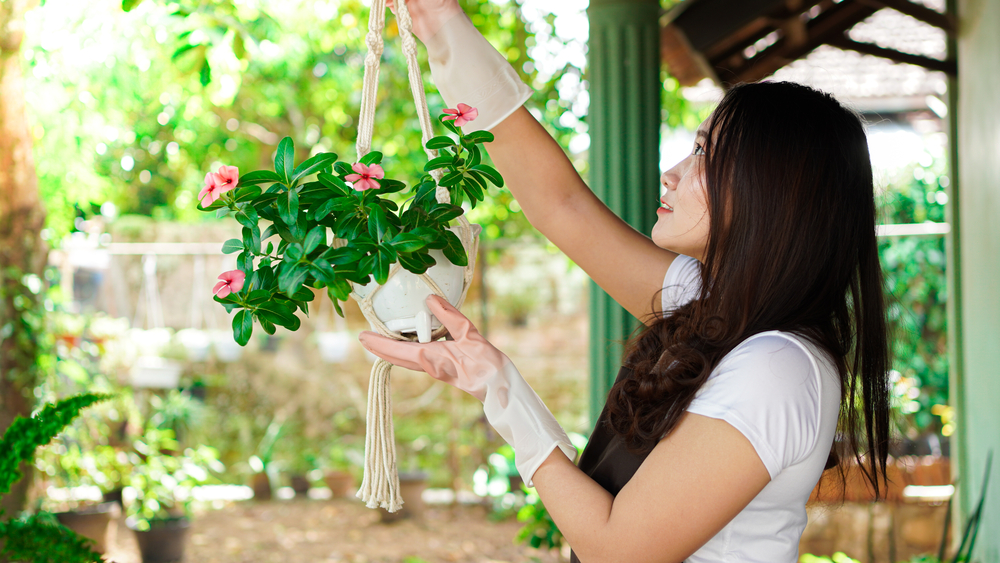
Macrame hanging planters are made by knotting and cording into decorative and functional patterns. With that in mind, let’s look at how to make a macrame plant holder.
Supplies
- Scissors, ruler, or measuring tape
- macrame cord, metal or wooden ring, pot
Step 1: Measure and Cut the Cording
Begin by getting a rough measurement of how long you prefer your macrame planter to be. Add approximately 11 inches to the measurement. This helps ensure that the plant hanger won’t be too short. Proceed by cutting eight equal lengths of the cord.
Align all eight pieces on a flat surface and tie a knot to one end. The tied end will be the bottom tassel of your plant holder.
Using a measuring tape, measure out the height of the pot you will be using. After getting the pot’s measurement, subtract it by one inch and then divide the number by two. This will then give you a rough estimate of how the knots will be tied.
Step 2: Tie the First Row of Knots
Now take the eight pieces of the cording and divide them into two cords each, and spread them out. At approximately one inch from the tassel knot, tie each set together. At this point, your plant hanger will resemble a flower.
Step 3: Tie the Second Row of Knots
For the second row knots, use the measurements you took in the first step to determine how far you should space your knots.
Please start with the left cord from one set of the cording. And tie it to the right cord from the set that sits directly to its left. Ensure that you space the knots according to the measurements you recorded in step one.
Repeat this step for the other three sets of cording. And use it to make the tie on the third-row knots. Once you’re done, you should notice that the knotting of the cording should resemble a flower in a square shape.
Step 4: Place Your Pot Into the Plant Holder
Once you’re done knotting the third row. Place your pot on top of the cording for the tassel to be centred at its bottom.
Bring up all four sets of the cording, and adjust the pot if necessary to ensure that the pot is aligned properly inside the macramé plant holder.
Step 5: Tie on the Ring and Hang your Macrame Plant Holder
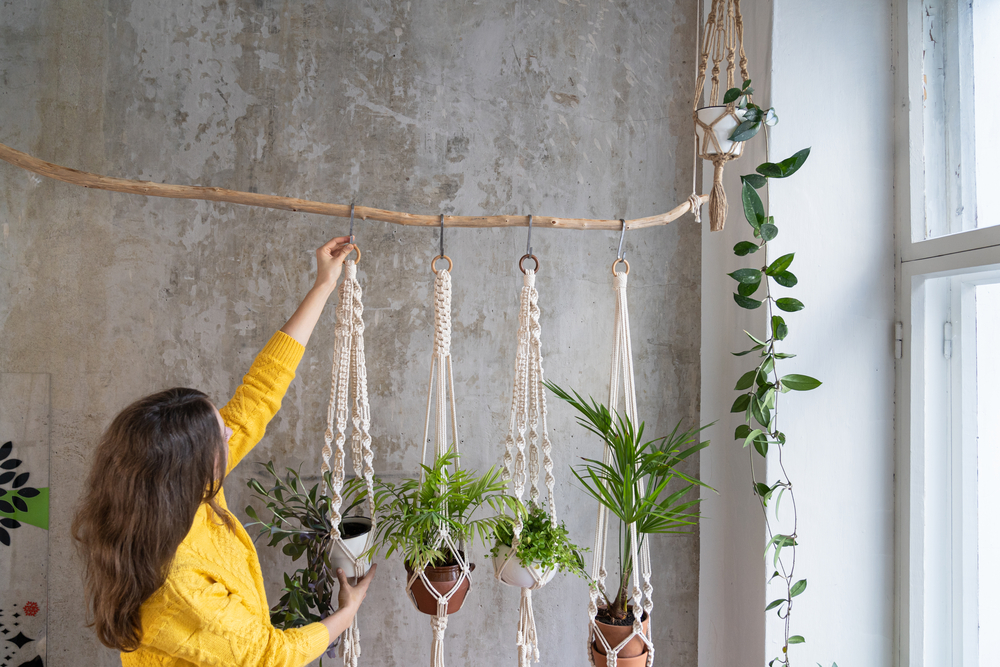
Now that your pot is in place, knot the top ends of the cording around the metal ring. And trim the extra macrame cord to your preferred length.
Using a bracket or hook on your ceiling, hand your Macrame hanging planter. You can fill it with a candle, flowers, succulents, or air plants.
How to Make a Vertical Plant Hanger
Are you looking to add green scenery to your porch or house? If yes, then you can never go wrong with tiered planters. Not only do they take less space, but you can use them to grow your favourite plants. Moreover, making a vertical planter is straightforward.
Supplies
- Clamp
- Drill (and 3/8″ (.95 cm) boring bit)
- Drop cloth
- Glue (optional)
- Pencil (or marker, chalk)
- Pots or metal bowls(2+, same sized)
- Rope
- Sandpaper (medium grit; 60 – 100)
- Saw (jigsaw or reciprocating saw)
- Scissors
- Sturdy metal ring
- Tape measure
- Wood (thick and sturdy preferred)
Step 1: Prepare Your Work Area
Before making your vertical plant hanger, ensure that you’re working on a flat surface that is not obstructed.
This will prevent you from tripping and accidental injuries. Moreover, ensure that you lay a drop cloth on the working area to catch the sawdust.
That said, keep in mind that a clean surface is safe and the easiest to work on.
Step 2: Mark the Dimensions of Your Wood
Take your preferred pot and place it upside down on the wood. And using a pencil, outline the pot’s mouth on the wood.
Once done, use a tape measure to measure and mark the wood 1-2″ on the top, bottom and outside the sides of the circle. You will use these marks to form the outer edge of one tier.
That done, it’s worth mentioning that the thicker spacing between the outline of the pot’s mouth and the edges of each tire will create a sturdy hanging planter.
Repeat the process to mark out tiers in your wood and ensure that the spacing in all tires is the same. Furthermore, it’s advisable to only make three tiers in any vertical planter since the more the tiers, the heavier a hanging planter gets.
Step 3: Cut Tiers From the Wood
Once you’re done marking the dimensions on your wood, use a straight edge to extend horizontal lines through the top and bottom marks. Also, draw vertical lines through the left and right horizontal lines to complete a square tier outline.
Using your preferred type of saw, cut out each tier according to the boundary marks to create equal-sized, square wooden tiers. Optionally you can always clamp the wood to your work surface before you begin cutting out any tiers.
On the other hand, if you’re using a reciprocating saw, ensure that you wear the appropriate safety equipment. This includes protective eyewear, a dust mask, and gloves.
Then rub medium grit sandpaper using moderate pressure to smoothen out the rough spots and burrs.
Step 4: Mark the Holes for the Pots
Now it’s time to cut a tiered hole for your pot. Ensure that the hole is not too big since the pot will fall through. Also, if the tier hole is too small, the pot will sit unbalanced. On your tier, draw out a second circle that is approximately 0.64 cm inside the outline of the pot’s mouth. Repeat the above process for the remaining tiers.
Step 5: Cut the Inner Holes Free of the Wood
Clam the wood to ensure that the inner hole is positioned with nothing at its bottom. Using a saw, cut out the inner circle along the line you drew until the wood drops out on its own.
Avoid cutting from the edges since it might compromise the stability of the tiers. Or, you can use a drill and a boring bit to create a start point that you will use to see the inner circle.
Step 6: Drill Your Rope Holes
Using ab measuring tape or ruler, measure out and mark four points on each tier, and ensure that there is one point in each corner.
Ensure that the marks are approximately 1.27 cm from both the edges of each corner. Once you’re done, use a drill and a boring bit to make holes at your marked points.
It’s noteworthy to mention that when making rope holes on the tiers, ensure that you maintain a consistent pattern or your planter may hang crookedly.
Step 7: Plan the Distance Between Tiers
For this step, note that the distance between the tiers will depend mostly on the type of plants. And the size of plants you will be planting. Bear in mind that taller plants may require more vertical spacing when compared to their short counterparts. However, in most cases, a spacing of 30.5m will be sufficient for separating tiers.
Once you’re done with the tiers, it’s time to estimate the amount of rope required. Ensure that you add an extra 30.5cm of rope that will be used to fasten the top of the hanging planter.
Step 8: Attach the Rope to Your Ring
Once you find your ideal measurement, cut out four strands from the rope, and ensure that they all have the same size. Proceed to align all ends for them to be collected evenly.
Thread one end of the rope through the metal ring and then tie it to an overhand knot. You can use transparent glue to strengthen the knot or add a layer of glue and allow the glue to dry out. Optionally you can use duck tape if you don’t have glue.
Step 9: Hang Your Tiered Potted Plants
Once the glue has dried completely, separate the strands of rope. Feed each strand through the corner hole in your wooden tier. Measure out your pre-recorded distance and then tie a thick overhand knot below the corner holes.
Repeat the process for the remaining tiers, and once you’re done, your hanging planter should be ready. Add planting soil to your pots and plant your desired plant. For the final step, hang your planter in your preferred area and insert the pots in the centre holes for each tier.
Well, that is how you make vertical hanging planters.
How to Decorate Your DIY Hanging Planters
Beautiful hanging planters can be used as a statement on any patio, house, or garden. That’s why when working on any DIY project, you should always be as creative as possible, and hanging planters are no exception. Well, here are some ways of adding glam to your plant hangers.
Method 1: Thread Wooden Accents and Beads on your Rope
When making a rope plant hanger, you can add beads above the knotted portions. This will give your rope-hanging planter a polished and professional look. Optionally you can use glass beads as they usually add a sparkle.
Moreover, you can also add a pin or a hook to the excess rope below your hanging planter. You can also use the hook or pin to hold ornaments or knickknacks.
Method 2: Paint the Hanging Planters
When making hanging planters, you can paint them with a colour that matches your home decor. For most ropes, you can use acrylic paint. You can spray paint them and wait for them to dry up before adding the potting soil for most tin cans.
For wooden tiers, it’s always advisable to sand, clean, and prime the wood before painting it to give the tiers a clean and smooth finish.
Method 3: Braid and Weave Excess Rope
Once finished, you may be left with excess rope at the bottom. Many times people tend to cut it away. However, consider braiding or weaving it instead of cutting the extra rope.
How to Make a Herb Garden Using Mason Jars
Do you love cooking with herbs? Or are you tired of running to the store every time your recipe requires a herb as a must ingredient? Well, the good news is you can make your own herb garden. Whether or not you live in an apartment that lacks an outdoor space or yard. Here is a simple way of making a simple herb garden.
Supplies
- Mason jar
- twine
- Measuring tape
- Scissors
- A handful of small rocks and dirt
Step 1: Lining the Mason Jar with Rocks
Place about an inch of rocks at the bottom of your preferred jar
Step 2: Adding Dirt and Planting
Once you’re done lining the rocks at the bottom. Add approximately 1 inch of dirt to the jar and plant your preferred herb.
Step 3: Measure, Cut, and Tie the Twine
Using a measuring tape, measure out the twine to your preferred measurement and cut. Take one piece and tie it around the lip of the jar. And tie the other twine snugly around the lip of the jar and ensure the knot is the opposite side of your first knot. This should give you four hanging pieces of the twine. Bring all the four pieces together and tie them to form a top handle.
Step 4: Hanging the Mason Jar
For this final step, use the top handle to hang your jar on a window. You can also try to make more of these hanging planters and plant your favourite plants. If you don’t have spacious windows, you can opt to make a wood-hanging planter to place your plants instead of hanging them.
What to Consider When Making DIY Planters
Weight
The best hanging planters can sustain the plant without causing damage to the wall or ceiling. By this, you should always ensure that the hanger and planter shouldn’t be too heavy. Moreover, it’s always important to consider the amount of weight added once the plant is watered.
That said, ensure that the cord or rope used to hang the planters are sturdy and should be in good condition.
Type and Size of the Plant
When making plant hangers, starting with small plants is advisable since they are bound to grow. Such plants include succulents and ivy plants since they are low maintenance and don’t require constant watering. With that in mind, ensure that the plants are placed at strategic points to easily access adequate sunlight and ventilation.
Vines, Ivy, and Ferns grow long, but they are thin and light, while succulents tend to be thick but not heavy. However, if we’re to settle for indoor plants, we would settle for orchids since they radiate beauty.
Materials Required
When making DIY hanging planters, it’s always essential to consider the materials you will be using. Ensure that you go for a sturdy, robust rope, chain, or cord. Bear in mind that the planter can be made using wood or ceramic as long as it doesn’t put too much pressure on your celling. Moreover, ensure that you go for materials that won’t give you a hard time crafting your desired hanging planters.
Give Your Home a Greenery Look
Well, that is it on how to make hanging planters. Keep in mind that the best thing about hanging planters is that they are not only easy to make, but they are also affordable. So if you’re looking for easy to craft DIY projects, then you should try making different types of hanging planters for your favourite plants.
Additional Resources
- How to Waterproof Wood
- How to Restore a Wooden Garden Bench
- How to Apply Wood Preserver
- How to Paint Corners
- How to Distress Wood
Ian loves everything that revolves around the home improvement niche. He loves trying out new home appliances. He has also handled a lot of equipment and has a lot of insight. Plus, he’s worked on various home improvement projects that became a success. If Ian isn’t busy working on his latest project, you can find him reading up about another one!