
You are standing admiring your newly tiled bathroom. The ceramic tiles look superb! However, you realise that you need to drill through them to attach various bathroom accessories! You have never done this before and wonder how to drill into tile safely and without causing damage. Don’t worry! In this guide, we will provide vital tips on ways to drill into a tile for your benefit!
Potential Issues With Drilling Into Tiles
And my third and final trick: drilling two holes through ceramic tiles to mount a toothbrush mug. *buffs fingernails* pic.twitter.com/t4JqoWAPGc
— Matt Gibson (@gothick) February 8, 2014
Drilling tiles can be incredibly tricky if you do not have the right tools and know-how. Firstly, tiles are tough and much harder to drill through than other materials. As a result, you must have the correct drill bit for your power drill.
Secondly, tiles can also crack easily. If you use the wrong drill action or the incorrect drill bit, you can easily crack the tile surface. This would mean you have to completely remove the tile and install a new one which can be costly!
Tips for Drilling Tiles
Before we look at the process, there are some important tips to be aware of. Understanding these tips will help increase accuracy and make sure you do not damage the tiles.
Tip 1: Make Sure You Have the Correct Equipment
Preparation is always important when tackling any DIY job: having the correct tools and equipment helps speed up the process and keep you safe. The following are the minimum accessories and tools you will need:
- Power drill
- Carbide or diamond drill bit
- Wet sponge
- Tape measure
- Masking tape
- Pencil
- Safety goggles
- Latex-grip safety gloves
For protection, we advise wearing goggles whenever using the drill. This will prevent any debris particles from flying into your eyes. Safety gloves are also a great idea to help prevent any injury to your hands.
As you will see below, a sponge and masking tape are important pieces of equipment that will help with accuracy and drill safety.
Tip 2: Understand the Type of Tiles and Their Differences
There are many different types of tiles available. Tiles can be made in different materials, and this can greatly affect how you drill through them and the tools you need. Common types of tile include:
- Ceramic
- Porcelain
- Glass
- Marble
- Granite
- Natural Stone
Whatever the type of tile, care is required, and special drill bits are required, as detailed below. Stone, granite, and marble tiles are generally easier to drill through. In contrast, a porcelain tile or ceramic tile can present the most resistance.
Tip 3: Make Sure You Have Specialist Drill Bits
Harder materials like tiles require specialist drill bits to penetrate the surface effectively. Do not try to use a standard drill bit for tiles. In most instances, a standard drill bit is simply not strong enough to penetrate through the tile. You may also risk shattering the drill bit and causing damage to your drill.
The following are the two common drill bits used for drilling tiles:
- Diamond-tipped drill bits
- Carbide-tipped drill bits
Caribe drill bits are better suited for ceramic tile, whereas diamond-tipped drill bits can easily tackle porcelain stoneware and tiles. A porcelain tile is generally the toughest among the types of tiles, and we would not recommend using anything else except a diamond-tipped bit for this type of tile.
Tip 4: Patience Is Vital
Drilling ceramic tiles or porcelain tiles is not something that you can rush. Other materials like wood do not require as much patience. You can drill through them quickly and use faster drill speeds. This is simply not the case for tiles.
You must be patient and take this process slowly. If you try to rush and use a faster speed, you are far more likely to crack the tile.
Drilling Tiles Without Cracking – A Simple Guide
The above tips should give you confidence and help greatly. We can now look at the actual process of how to drill through tile.
To help drill the hole perfectly and without cracking the tile, you could first use a spare tile as a test piece. This will allow you to improve your skill and not risk damaging the finished tiles. After this, you can use the following five steps on how to drill ceramic tile:
Step 1: Measure and Mark
Before even picking up the drill, you must mark the tile so you can see exactly where you need to drill. The tile’s surface can often make drilling difficult. This is because the glaze and the smoothness of the surface can make your drill slip.
As a result, you may first want to place a strip of masking tape over where you want to drill holes. The masking tape will add tension and makes drilling tile easier.
Next, using a tape measure and pencil, measure the spot and clearly mark it. We advise measuring several times to make sure you have accurately made the mark. Also, make sure the mark is on the masking tape to avoid making a mess of the tiles.
For increased accuracy, you can also buy drill guides. Drill manufacturers and tiling manufacturers often make these guides as an accessory. They are usually plastic casings that can be attached to the tile to give your diamond-tipped drill a precise location to drill through.
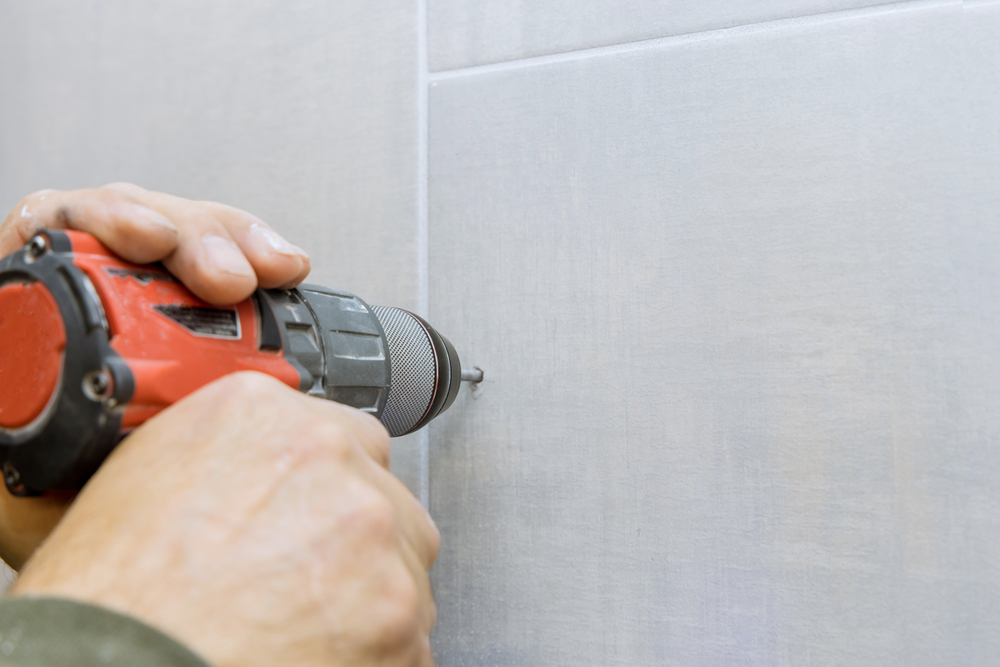
Step 2: Start Drilling at a Low Speed
Once you have marked the hole, you can prepare your drill and attach the correct drill bit. Start drilling at a low speed. If you drill tiles too quickly, you can create vibrations that can crack the tile. While drilling slowly, do not apply too much pressure – keep the pressure even until you have drilled through the top layer of the tile (i.e. the glaze).
Step 3: Keep the Drill Bit Cool
When drilling a ceramic tile, it is vital to keep the drill bit from overheating. If the drill overheats, it is more likely to cause damage to the tile surface. You can use many complicated methods to keep the drill cool; however, all you need is a wet sponge.
As you drill, occasionally dab the drill bit with the wet sponge to effectively keep it cool and prevent it from overheating.
Step 4: Increase the Speed as Required
Once you have penetrated through the initial glaze and layer using even pressure, you can increase the drill speed. This is not essential, and it could be a better idea to simply drill slowly throughout the entire process. The downside here is that it will take longer to drill the hole.
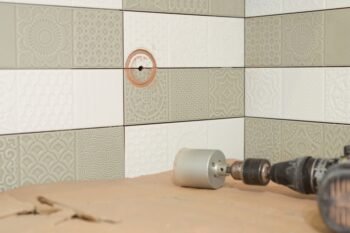
Step 5: Change the Drill Bit Once You Have Penetrated Through the Tile
Continue to drill slowly until you have penetrated through the tile and have reached the backing board or substrate that the tile is attached to.
It is now a great idea to change your drill bit to suit the substrate material. This is because a diamond-tipped drill bit may not be suitable for drilling the surface behind the tile.
Swap to a masonry drill bit if the tile is attached directly to brick, concrete, or natural stone. Alternatively, if it is attached to timber, a wood drill bit is preferential.
Tile Drilling FAQs
#DIYTip: When drilling though ceramic tile place masking tape on the surface, it helps the drill stay in place. pic.twitter.com/uKAnfUTK36
— Speedex Tools (@speedextools) December 8, 2014
Can You Use a Regular Drill Bit to Drill Through Tiles?
No. Generally, a standard drill bit is not strong enough to drill through tiles. They may not penetrate the hardest tile surfaces, and you could even risk shattering the drill bit.
Can You Use a Hammer Drill to Drill Tiles?
This depends on the modes the drill has. If it only has a hammer action, no. If it has a rotary drill mode, and you can attach a specialist drill bit, yes.
What Is the Best Tile Drill Bit?
Carbide tipped drill bits are often considered the best suited for tackling tiles without cracking them.
Drill Your Tiles Carefully
We hope you have benefited from this guide! You should now have a clear idea of how to drill into tiles using the right tools without cracking them or causing damage to your drill!
Additional Resources
- How to Distress Wood
- How to Fix Squeaky Floorboards
- How Long Does Paint Last
- How to Paint a Front Door Without Removing It
- How to Make Hanging Planters
Paul is the type of person who never met a problem he couldn’t fix. He can always be found tinkering with something in his house, even if it isn’t broken! His tips and tricks are often shared on our site. He’s the one you call when something breaks because he has been known to improvise fixes for everything from leaky faucets to malfunctioning dryers.