
The heating element in a soup maker is located in its base. Unfortunately, this can easily lead to your soup burning on the bottom part which negatively affects the taste and makes it more of a task to clean.
When it comes to cleaning a burnt soup maker, you want to avoid using any caustic chemicals to get the job done. These chemicals could be hard to remove entirely and get into your food, or possibly even damage the heating element. That’s why we created this article to teach you how to clean a burnt soup maker easily and safely without having to use a lot of effort.
There are several methods you can employ that could be fairly effective, like baking soda and vinegar. However, we found that the enzymes in biological washing powder work best for us and we think you’ll agree it’s the best way to get the job done as well.
What to Prepare
Before you begin the cleaning process officially, you will first want to make sure you have all the supplies you need and gather them in one place. You will need the following supplies:
- Boiling water
- Non-metal scrub brush or pad
- Biological washing powder
- Measuring cup
Cleaning a Burnt Soup Maker: Preferred Method
Always double-check to make sure your device is unplugged to avoid potentially damaging the motor or hurting yourself while you complete this cleaning method.
1. Mix Your Cleaning Solution
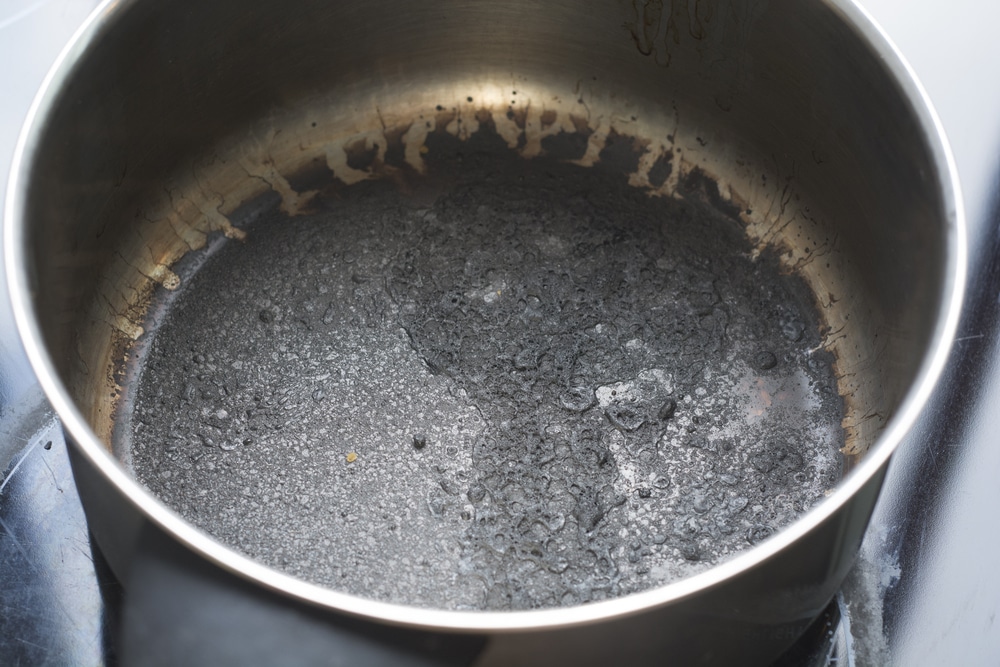
First, you will want to mix your cleaning solution. Start by adding enough boiling water to the pan to completely cover the burnt area, plus another few centimetres for good measure. Then mix in a bit of biological washing powder to the boiling water in the pan—approximately 150ml should do the trick.
2. Soak Overnight
Leave the pot to soak overnight so that the enzymes have enough time to break down the burnt pieces of food. Take care to keep the soup maker out of reach of children and curious pets and away from the edge of the countertop.
3. Scrub With a Non-Metal Cleaning Pad or Brush
After letting it soak, use a non-metal scouring pad or scrubbing brush to remove the charred food in the pan. Take care not to use a particularly abrasive scouring pad that could potentially damage the pot or jug in the process. At this point, the burnt food sticking to the bottom of the pan should be fairly easy to scrub off without having to put in a lot of extra effort.
View this post on Instagram
4. Rinse and Repeat Step 3 if Necessary
Rinse out the loosened debris and assess the situation. If all of the burnt food is gone, move on to the final step. If not, repeat step 3 before moving forward.
5. Thoroughly Wash Your Soup Maker
Finally, you will want to completely wash any remnants of the cleaning solution from the interior of your equipment. Once completed, you are all done and can feel free to start using it again.
Other Considerations and Pro Tips
Now that you know how to clean your burnt soup maker, you may want to consider how to prevent this from happening in the future. The following parts of this article address exactly that so next time, your cooking sessions can run more smoothly.
What Causes My Soup Maker to Burn on the Bottom?
The most likely cause for your soup maker burning on the bottom involves making your recipes with too many solid ingredients and not enough liquid. You may also encounter a burning problem if the temperature is turned up too high.
@LoveYourMorphy had my soup maker since Christmas and it burnt the tomatoes the black stuff won’t come off with just hot soapy water what do you suggest as it won’t work now. pic.twitter.com/EZK6OA100f
— Sarah Lou (@phoebay83) February 13, 2018
Be sure to learn how to use your soup maker correctly and troubleshoot any potential causes so you don’t make the same mistake again. Whether you’re using a Morphy Richards soup maker or other brands, you have to read the manual thoroughly. In addition, always be sure to follow recipes exactly and only use recipes specific to the model you’re using if you are unsure.
How Can I Prevent the Bottom of My Soup Maker From Burning?
Aside from turning down the temperature, you may want to try adding water to your recipe. If it seems too thin for your preference at first just remember that the solid ingredients will absorb some of the liquid, especially if your soups contain garlic, potatoes, or beans.
 Additionally, considering how the heating element of most soup makers is located at the base of the appliance, it is important to stir your soup frequently, depending on the recipe. As you would when cooking in saucepans, stirring your food will prevent it from sticking and circulate the liquid to ensure even cooking.
To prevent a disastrous mess, never remove the lid while the blending function is in use.
Pro Tips
- You can also use biological detergent and hot water to clean your oven racks and the walls of your oven, too.
- Feel free to use less expensive biological washing powder to remove burnt-on food. A lot of times people find that it works just as well as more expensive options. Thus, you can use washing powders that are readily available from local stores.
- Some models feature a cleaning cycle as one of their settings. If you are fortunate to have a device with this feature, try this method to remove burnt-on food before going straight for the deep clean. Often, a burnt mess will still require further attention but it certainly doesn’t hurt to give yourself a head start.
Conclusion
You have come to the end of our article on how to clean a burnt soup maker. Through the information we shared, you should be all set to get rid of the scorched food sticking to the bottom of your appliance.
When cleaning your soup maker, just remember to avoid caustic chemicals and always use a non-metal scrub brush or pad to avoid damage. With these handy tips, you’ll be cooking in your soup maker again in no time at all.
Have you tried cleaning your burnt soup maker? How was your experience? Let us know how you get on!
Additional Resources
Emily is a woman of many talents. She has a B.A. in English and enjoys writing. Emily loves accessorising her home with quality products that not only serve a purpose but also enhance the overall convenience and tranquillity of her living space; there’s nothing like coming home to your own personal sanctuary after a long day! She loves anything that can make life easier or more comfortable—from dishware to furniture to lighting fixtures.