
Soup making is a whole lot easier with help from a soup making machine. Soup makers are great at making chunky recipes like with a veg soup but also feature a blending function that allows you to make smooth recipes like tomato soup or butternut squash. With a soup machine, you can easily add your ingredients, set the soup cycle, and forget it until it is ready, freeing you up to do other important tasks while your meal cooks. Of course, to make the process as easy as we make it sound, you will first need to know how to use a soup maker.
That’s why we created this article full of helpful information and step by step directions to help you learn to use your soup maker with ease. With a little bit of help from our article, you’ll be creating soup maker recipes like a pro in no time!
Before You Get Started
Before you jump right into and start using a soup maker, we recommend you take the following preliminary steps. They will help you make sure you are doing things according to your particular soup maker and also ensure that making your recipes goes as smoothly as possible.
View this post on Instagram
Read the Instruction Manual
With any new soup maker, it is important to read the information contained in the instruction manual. Not only will it alert you to the machine’s specific features and unique traits, but it will most likely contain recipes as well. Additionally, the manual could help you resolve any issues that arise when you are first learning to use the device.
Gather and Prepare Your Supplies and Ingredients
Read through the recipe you plan on making and gather all of the ingredients you will need, as well as a few supplies. Make sure to wash your vegetables thoroughly with water to remove any bacteria that can be left behind by soil or other contaminants.
Most Commonly Needed Supplies:
- Cutting board
- Sharp chopping knife
- Large spoon or ladle
- Saute pan (if your soup maker doesn’t have this function)
- Spatula
How to Use a Soup Maker: Step By Step Directions
The following directions serve as general instructions for any soup maker recipe. They are not specific to any particular soup maker but should serve you well in most cases. Feel free to alter where needed.
Step 1: Chop the Ingredients Into Small Chunks.
First, you will want to start off by chopping your ingredients into small pieces. For a chunkier soup, like a hearty vegetable soup, cut the veg and possibly meat into slightly larger pieces. Try to make all of the ingredients as uniform in size as possible.
Step 2: Saute the Ingredients.
Whether or not you decide to saute your vegetables before you start the soup making process is optional and depends on your own personal preference. Sauteeing some veg and meat can help release flavour but it is not necessary. Some soup makers, like the Morphy Richards Soup Maker, have a saute function that allows you to saute vegetables and meat at the bottom of the machine. If your soup maker doesn’t have this feature you will have to use a separate frying pan. Always use a bit of oil with the ingredients you choose to saute; we recommend rapeseed oil or olive oil and only cook vegetables long enough to start releasing the flavour.
Step 3: Add the Chopped Ingredients to Your Soup Maker.
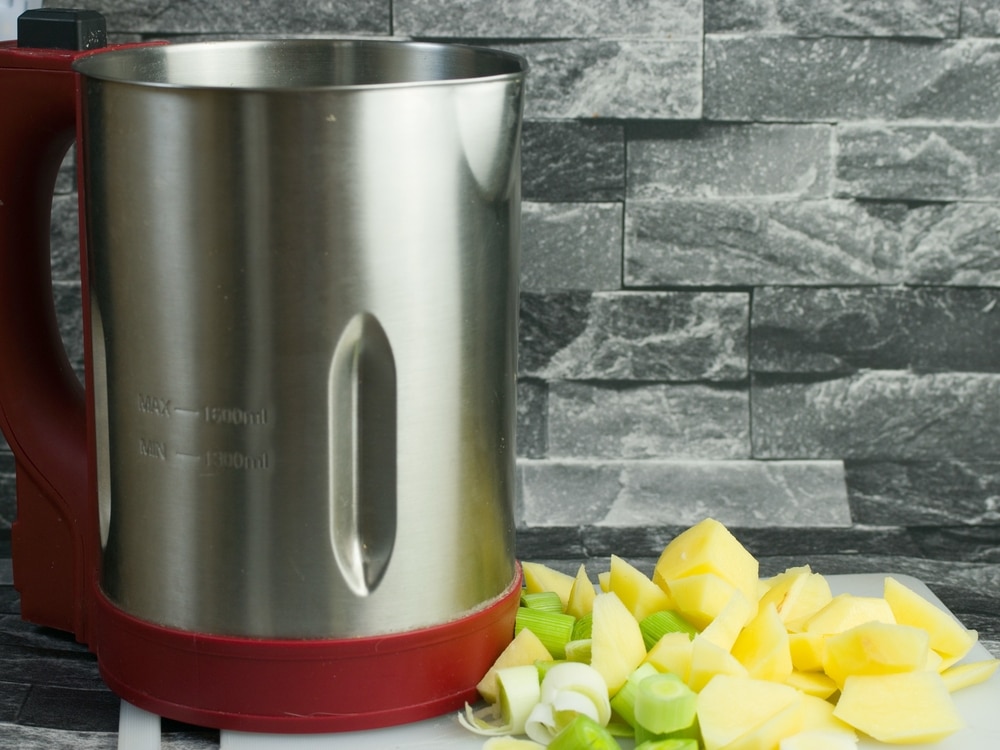
Add your chopped, and possible sauteed items, to the soup maker. Pay attention to the fill lines and make sure not to overfill. Most soup makers have clearly marked lines.
Step 4: Add Stock to the Soup Maker Contents.
Add stock to the ingredients again making sure to pay attention to the minimum and maximum fill levels denoted by your soup maker. You may also choose to add spices with the stock but make sure not to overdo it at first because the flavours will only grow and intensify while the soup cooks.
Step 5: Replace the Lid and Select the Preset Program Best Suited to the Soup Recipe.
Next, select the setting on your soup maker that will cook your ingredients according to your soup’s recipe. Soup makers have preset settings that cater to specific soup recipes. They can make recipes that call for chunky or smooth consistency soups. As a result, some settings use the blender function, some more than others, and some not at all. On most soup makers the cooking cycle functions for about 30 minutes.
Step 6: Flavour to Taste.
After the soup maker cycle is complete, taste your soup and add spices as needed. Stir thoroughly and taste again. Repeat if needed.
Step 7: Serve and Enjoy.

Once you reach your desired flavour and consistency, your soup is ready to eat. Using a ladle, scoop the liquid out of your soup maker and put it into a bowl or serving dish, and enjoy!
Step 8: Wait For the Machine to Cool Completely Before Cleaning.
After your soup maker has cooled down, clean each part, taking special care when cleaning the blades to avoid possible injury. Always unplug your soup maker before cleaning and running it underneath the water. Once cleaned and dry, store your soup maker until the next time you want to make soup.
Unanswered Questions and Soup Maker Tips
Aside from the step-by-step directions, we have provided on how to use a soup maker, there are several things you should know before using a soup maker that will help you along the way. The following sections explore some common questions relating to the operation of soup makers as well as some top tips. Combined with the previous directions, this information should have you ready to use your new soup maker with confidence in no time.
How Does a Soup Maker Work?
Most soup makers work like a saucepan and a smoothie maker all wrapped up into one device. However, as we briefly mentioned above, not all soup makers have a saute function.
The two main types of soup maker come in either a kettle or blender style. A kettle soup maker is opaque so you can’t see the soup cooking inside and the blade is attached to the lid making it easier to clean. A blender style soup maker has the blade located in the base possibly making it more difficult to clean and is most often equipped with a saute function.
Regardless of whether you use a kettle or blender style soup maker, it will, at the bare minimum, be able to cook soups quickly and also be able to blend soups when desired.
Don’t Remove the Lid While the Soup Maker Is Cooking
After selecting the soup setting and pressing start, do not remove the lid until after it is done cooking. If you open the soup maker while the blade is turning it is likely to overflow leaving you with a hot, potentially dangerous mess. Even if the blade is not spinning it is best to leave the lid on to prevent burns.
Do Soup Makers Have a Minimum Amount of Soup They Can Make?

In general, there is a minimum and maximum amount of soup that can be made with each particular soup maker model. This is based on their individual volume capacity and whether or not they have a small portion setting. Make sure not to fill your soup maker past the recommended maximum volume to ensure even cooking and to prevent messes.
What Types of Stock Can Be Used in a Soup Maker?
You can use any flavour of stock in a soup maker, homemade or store-bought. You can even use diced or pureed tomato as stock as long as you add some extra water to prevent the soup from burning on the bottom or sticking to the machine.
Do You Have to Cook Veg Before Putting It in the Soup Maker?
As we mentioned above, sauteeing your vegetables before turning them into a soup can release extra flavour but it is completely optional. Your soup maker model may even have a saute function to enable this before adding the stock. We find sauteeing some vegetables, like onions, before adding them to your soup can drastically change and improve the flavour of your soup overall.
Can You Put Raw Meat in a Soup Maker?
Unlike vegetables, you should always precook your meat before adding it to a soup. If your soup maker allows, you may be able to saute the meat in the machine before adding the other ingredients. You may want to try using leftover meat from other meals to make stews and soups in order to increase convenience.
How Small Should the Ingredients Be Chopped?
When it comes to cooking in your soup maker, smaller sized ingredients are usually better because they are able to cook faster. When you are chopping your meats and veggies, try to chop all of the ingredients about the same size to ensure all of the ingredients are done cooking at the same time. Of course, one of the big perks about using a soup maker is that it has a blender function so you don’t have to chop the food too finely; the machine will do a lot of the work for you.
Can You Use Frozen Ingredients in a Soup Maker?
You can use frozen foods in a soup maker as well, however, we don’t recommend using only frozen foods because it could damage the blades on the soup maker and significantly increase the cooking time. Instead, we like to blend small amounts of frozen foods with fresh ones as well.
Can You Fix Soup That Is Too Thin, or Too Thick?
If you find that your soup recipe turned out too thin for your liking, you can easily add beans or potatoes, and cook a little bit longer to soak up some of the excess liquid. They will also release a bit of starch which tends to thicken foods. You can also scoop out some of the stock and make sure to reduce the amount of stock you use the next time around. Another option is to make a paste with flour and water and add a small amount to see if it helps thicken your soup.
If it appears your soup is too thick for your preference, you can add a tiny bit of extra stock, water, or any liquid you like, to smooth and thin out the consistency. If this is the case, stir the soup well after adding the water or desired liquid and allow it to return to the desired temperature.
Can You Convert a Regular Soup Recipe Into a Soup Maker Recipe?
You bet you can! To make your favourite soup recipe compatible with your soup maker just make sure to adjust the total volume of the soup so that it will fit inside of your soup maker without going past the maximum fill level. Remember, a soup maker could even make your favourite soup easier to make thanks to the built-in blending function.
How to Store Your Leftovers

Leftover soup can last for up to 3-4 days in your refrigerator if you store it in an airtight container and allow it to cool a bit before covering. Freezing your soup leftovers is another great option if you don’t think you will eat it in the next few days. Soup can last for up to 4-6 months in the freezer, also in an airtight container with a secure lid. This should give you long enough to enjoy your creation for lunch another day in the future.
Can You Make Cold Soups or Smoothies in a Soup Maker?
Absolutely! Almost all soup makers have a setting that allows you to blend the ingredients without adding the element of heat to the mix. This is great for making smoothies, cold soups like gazpacho or cantaloupe, and sweet rice milk. Really, the sky is the limit when it comes to the ingredients you can use in a soup maker; you can even make cold drinks and other food that isn’t soup as well.
Time to Put Your Soup Maker to the Test
You have come to the end of our article and we hope you have learned how to use a soup maker correctly. Now it’s time to put your new soup maker to the test. Just remember to follow our directions and consider all of the pro tips we covered and you should be eating delicious homemade soups, and maybe even smoothies, in no time. What soup will you make first? Mushroom soup? Lentil soup? Hearty meat and veg stew? The possibilities are nearly endless!
Additional Resources
Emily is a woman of many talents. She has a B.A. in English and enjoys writing. Emily loves accessorising her home with quality products that not only serve a purpose but also enhance the overall convenience and tranquillity of her living space; there’s nothing like coming home to your own personal sanctuary after a long day! She loves anything that can make life easier or more comfortable—from dishware to furniture to lighting fixtures.
Found the information on this site really helpful, now off to have a go at making my own soup.
Thank you