
A scroll saw is one of the best tools available for creating detailed patterns and designs in materials like wood. If you have a detailing project or patterns you wish to create, a scroll saw allows for the required precision and control.
If you own a scroll saw, or want to buy one, you may not be sure how to use it. This is understandable as a scroll saw does have a greater learning curve than a simple tool like a hand saw. With our step-by-step guide, we’ll teach you how to use a scroll saw. We also offer a host of useful tips and advice to help you make the most of this fantastic tool.
How to Use a Scroll Saw – A Simple Guide
Let’s jump right into it and learn how to use a scroll saw effectively! Once you understand the basics, this is a simple machine to operate. Scroll saws are also quite safe compared to other types of saws.
However, there may be a learning curve for different types of material, and making intricate cuts. Your skill with this machine will improve so don’t worry. The more you use it, the easier you will find it to cut intricate designs. Before we get ahead of ourselves, it’s important to know the basics. Below is a simple 7-step guide on using a scroll saw!
Step 1 – Preparing Your Materials and Saw
The first step is always preparation when working with any power tool or piece of equipment. Without preparation, you can have problems and even cause safety issues too. When using a scroll saw, you must prepare your materials and the machine.
Prep for wood or whatever project you are cutting is simple. Essentially, you should draw the pattern or design onto the material. Use a pencil as this can be rubbed-off afterwards. It is important to make sure the pattern is visible so that you can easily see it when cutting.
Prep for the scroll saw is also quite simple. First, ensure the scroll saw is in position. Next, make sure it is secured onto the work surface and that it cannot move. Generally, the scroll saw will include instructions for clamping or bolting to your work surface. It is vital that you check this so that you have a stable platform to work from.
Next, check the condition of the blades, and the blade tension. Ensure the blades do not have a missing tooth or any damage as this could cause problems when using the scroll saw. Also, check the power of the scroll saw—simply power it up and back off to ensure it is working properly.
Step 2 – Gear-Up!
 Whilst scroll saws are quite safe, we still advise wearing the correct PPE. Even if you are supremely confident with power tools and machinery, it is still important to wear protective gear. This can reduce the chance of an accident, or any unforeseen circumstances causing injury.
When scroll sawing, we recommend the following PPE:
- Safety gloves
- Protective goggles
- Dust mask
Safety gloves will protect your hands from the blade. It is important to get the right gloves that offer protection, without limiting your movement and control. Goggles are also a must to protect your eyes from any stray pieces of wood or material that could fly up.
Finally, and most importantly, we recommend a dust mask. Even if your scroll saw has a dust blower or dust extraction tool, there may still be debris, filings, and shavings. If you breathe these in, they can cause great damage to your throat and lungs.
Step 3 – Power-Up!
You can now turn on the mains power for the scroll saw in preparation for using it. Simply connect the main plug into the electrical socket and switch on the power. We advise reading the instruction manual fully before ever using the scroll saw. This will make sure you understand how the various parts work, and where all the relevant switches and features are.
Step 4 – Testing the Scroll Saw Blade
Before cutting the actual material, it is best to practise and test the end blades on a scrap piece of material. This allows you to check the blade tension, get the correct variable speed, and make sure the blade is cutting through the material properly.
Remember that different materials may need different types of blades, and you may also need to adjust the blade tensioning. Over time, you will get used to what type of blade can cut through which materials. Also, your judgment on setting the blade tension will also improve.
However, using a test piece of material to set the blade is a great idea. You can make sure you have the proper settings. Also, you can ensure you do not damage the pieces of material you wish to cut with incorrect settings.
Pro Tip – Buy a small storage container to keep material offcuts in. Instead of throwing offcuts away, place them in this container to use as test pieces when setting your scroll saw!
The test piece should be the same as what you intend to cut. For example, if you want to cut wood, you would not use a test piece of plastic. These objects would have different densities and may require different variable speed settings or blade tension.
Blade Tension
An important aspect of the testing process is the blade tension. Most scroll saw devices will allow you to make simple changes to the tension of the blade. Exactly how to change the tension of the blades should be detailed in the instruction manual. There is no set rule to get the right tension for your scroll saw blades – you must use your judgment and find a balance.
On the one hand, the blades must have enough tension to cut effectively. If it isn’t tense enough, the blades will cave and fail to cut. In contrast, too much tension can cause the blades to snap from the pressure.
One simple way to check the tension of the scroll saw is to pluck the blades like a guitar string. Depending on the type of blades, they should make a sharp pinging noise. As a general rule also, the type of blades affects the required tension. For example, larger blades can withstand greater pressure as they are stronger.
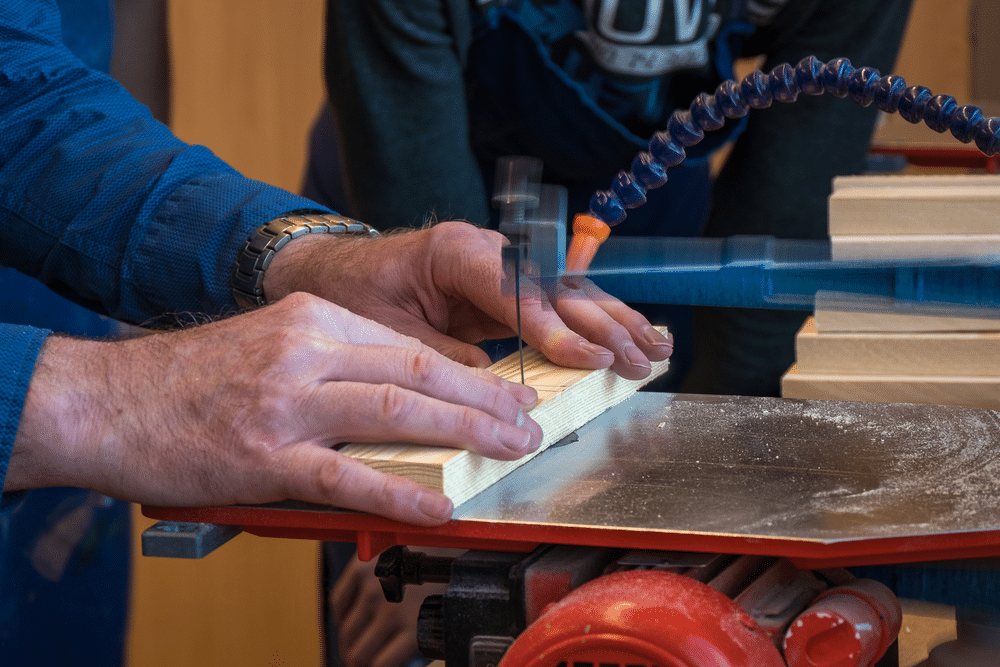
Step 5 – Sawing Your Material
After you have the correct tension of the blade and are happy with how the test piece cuts, you can start cutting the actual final piece!
You should have a clear outline and markings on the piece you need to work on. There are now two methods you can use to cut and this depends on what you are cutting.
Cutting a Solid Shape From a Larger Piece
Most commonly, you will simply cut a solid shape from a larger piece of material. These are easier cuts to make and need less preparation.
Lay the wood or other object flat onto the saw table. Guide it towards the scroll saw blade and the first line you need to cut. Keep pressure on the wood and push it along the line of the cut – simple!
View this post on Instagram
Cutting a Shape Within a Shape
You may also have a project that requires cutting scroll saw patterns and designs inside a piece of wood like fretwork. This is still possible, but it requires a different approach.
First, you must drill a small pilot hole through the piece of wood, where you wish to make the internal cuts. The hole must be large enough for the blade to fit through. Once a hole is cut, detach the scroll saw blades. Next, place the hole over the hole on the work table, and pass the scroll saw blades through it, and re-attach them.
You can now make the internal cuts using the above technique.
Cutting Corners
Aside from the above, the other technique to be aware of is corners and when you need to change the angle of cut. Unless you have a spiral blade that can cut from any angle, you must do something different.
So proud of former student, Ryan Jeffery, for his talent in making this emblem w/ a scroll saw for our classroom #aged #mhjh @MH_FFA pic.twitter.com/oKv2e5MLDq
— Jacquie Albright (@jalbrightj) March 15, 2021
When you get to a new angle – don’t simply turn the wood. This can cut unwanted grooves in the wood. Instead, draw the blades back down the line you have just cut. Next, turn the wood to the new line and make a fresh cut from the correct angle. Instead of making one continuous cut, it is easier and more effective to make multiple cuts from different angles.
Step 6 – Power Down and Clean Up
Hopefully, you have successfully finished cutting and are happy with the end result! You can now power down the machine.
Before turning the power off you need to remove the material first. If you stop the machine with wood still attached, it could cause damage and it could get stuck in the blade. Once the wood is removed, turn the machine off – turn the power switch off, but also disconnect the scroll saw from its mains power source.
Now comes the boring part – the cleanup! We appreciate this is a tedious task, but it is important if you want the best usage from your scroll saw and to keep it in a good working condition.
First, remove the end blades from the C-arm. Check the saw scroll blades for damage like a broken tooth. If they do not need replacing, wipe them down to remove any excess debris and shavings. Once clean, place them in their storage container for future use.
Pro Tip – Removing the blade after usage helps keep them in a good condition and can help prevent rust and damage.
After removing the blade, wipe the different areas of the scroll saw including the work table where the materials are cut. This is the place where the most debris and shavings will gather.
Tips for Using Your Scroll Saw
To finish, we have listed some generic tips that will help with your work and projects when using the saw – enjoy!
Spend Time Honing Your Saw Skills
 When you have a new tool, it is tempting to dive right in and start working on projects immediately. However, due to the nature of the scroll saw and how it works, we advise against this. This type of device takes greater skill and finesse to control properly and to get the best results.
Therefore, spend time practising! Use scrap pieces of wood and try cutting different shapes and patterns. This will boost your confidence and help you understand the basics and limitations of the machine.
Always Ensure Your Materials or Wood Are Dry
One of the most important rules for a scroll saw is to never saw damp material. This can cause many issues such as clogging the blade, damaging the blades, and resulting in a poor quality cut. Always ensure any wood or material you have used is completely dry. If you do have damp material, dry it first with a cloth and let it dry out naturally.
Your Saw Should Be at an Easy-to-Manage Height
A scroll saw is not a handheld item. It will sit on your work table and most likely never move. As a result, the positioning and height of the saw on your table are vital. Ideally, the table on which the saw is sat should be mid-torso level – whether for a sitting or standing position. This provides the best comfort and the best working conditions. If you do not use the best height and a good table level, you could cause injury and back pains.
Consider Sanding Before Cutting
For a good cut and an easy process, sanding the material before can really help. You don’t have to sand the wood too much, but if you give it a light sanding to remove the top layer, you can greatly increase the speed at which you cut. It also makes the process safer.
Stack-Cut for Duplicate Projects
On some projects, you can save time by improving your speed by cutting duplicate objects simultaneously. For example – you have two pieces of wood that need to be cut to exactly the same size. To save time, you could stack these on top of each other, and cut them at the same time!
View this post on Instagram
Do Not Use Too Much Force
People often make the mistake of applying too much force when cutting. Whilst this may cut quicker, it can also damage the saw and blades. Hold the material firm and apply gentle pressure – this will ensure a safe operation, and an even cut.
Scroll Saw Frequently Asked Questions
1. What materials can you cut with a scroll saw?
This depends on the type of saw, and the blades it has. However, scroll saws can generally be used to cut wood, plastic, aluminium, brass, copper, leather, rubber, and other sheet metals.
Some really intricate scroll saw art with a high risk of breakage. Claudia is doing a great job! #golemont pic.twitter.com/sPB0ZwjHGZ
— Mr. Crane – LHS 210 Woodshop (@Lhs210Woodshop) January 30, 2020
2. What is the maximum depth a scroll saw can cut?
The standard depth is no more than 2-inches – this is due to the configuration of the machine, and the strength of the blade and motor.
3. Can you get handheld scroll saws?
Yes but these are known as jigsaws. Jigsaws are essentially handheld, portable scroll saws. They are still quite bulky and generally require a two-handed operation.
4. Do you always have to cut from an edge?
No, it is possible to start your cut inside the material. First, you must drill a small pilot hole in the material at the position you wish to cut. Next, remove the scroll saw blade and draw it through the hole. Once it is in the middle of the hole, re-attach the blade – you can then start cutting from the position of the hole!
Final Thoughts
Scraw tools are extremely useful woodworking tools. However, like all tools and machinery, it is important to know how to use a scroll saw to get the best results. Safety is of the utmost importance when using such tools.
If you’ve been using a scroll saw for your DIY projects and have some tips for ensuring the best outcomes every time, let us know in the comments.
Additional Resources
Paul is the type of person who never met a problem he couldn’t fix. He can always be found tinkering with something in his house, even if it isn’t broken! His tips and tricks are often shared on our site. He’s the one you call when something breaks because he has been known to improvise fixes for everything from leaky faucets to malfunctioning dryers.