
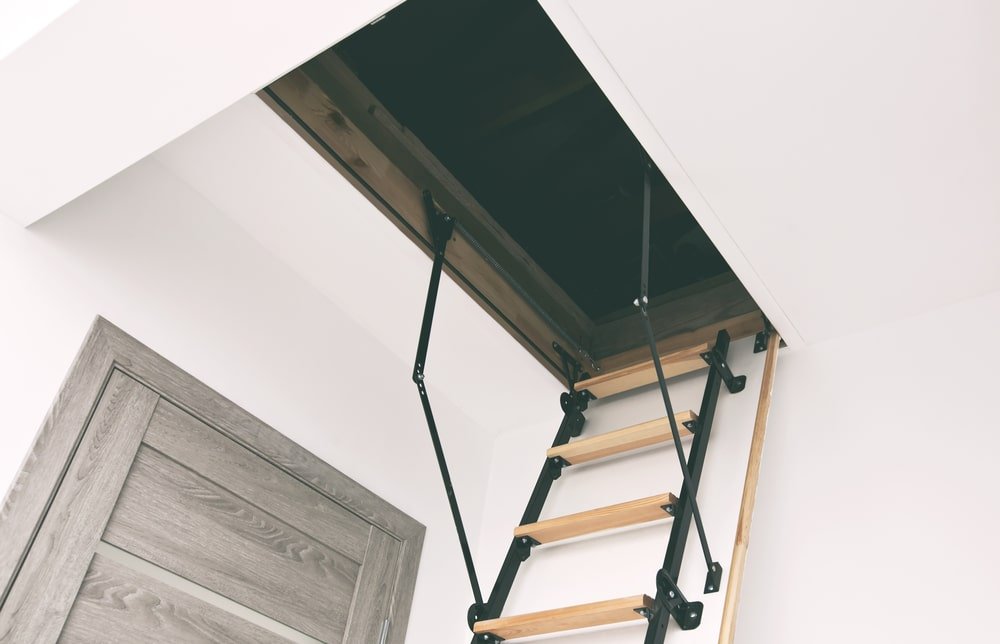
Having access to your loft space is important for various reasons. Firstly, you may need to access the roof or improve the insulation. Alternatively, you may want access to run cables through different rooms in your home. Also, many people use their loft as a storage solution for things they don’t want showing in their main rooms.
Whatever you use it for, a high-quality loft ladder can make access safe and easy. Hopefully, your loft has some form of a ladder. However, if it doesn’t you will need instructions for a loft ladder installer and how to attach one.
This task might be challenging for many homeowners, but we have collated essential information and created a simple guide on how to install a loft ladder for your benefit.
Loft Ladder Installation – Equipment List
 Before doing anything, to make the project easier we recommend gathering the necessary equipment and tools. The tools will vary depending on if you need to create an access hatch in your attic or not. Regardless, the following is a full equipment list:
- Tape measure
- Hammer
- Screwdriver
- Pencil
- Ruler
- Saw (A panel saw and tenon saw)
- Stanley Knife / Craft Knife
- A corded or cordless drill
- Wood screws (50mm size would be sufficient)
- Oval wire nails (50mm size)
Hopefully, you should have this equipment to hand in your toolbox or within easy access. You also may need wooden boards to create the hatch opening, and of course the attic ladder itself!
Installing a Loft Ladder: A Step-by-Step Guide
Once you are ready with your equipment, the project and installation can begin! We have broken this down into four steps, but you may not need steps 2 and 3 if you already have a loft hatch and simply need to install the ladder.
Important Tip – Loft ladders should always be installed with two people. They involve heavy lifting and can be dangerous for one person to work on.
1. Choose the Location
If you do not already have a loft hatch, you must choose a location and create a new loft opening for your ladder. If you have limited DIY skills or knowledge, we would recommend not attempting this alone – it can be a tricky task and you are essentially cutting a hole in your ceiling!
Consideration must be given to the loft hatch location. Firstly, you must check that there is enough headroom in the loft above the location. You don’t want to climb into your new loft and crack your head on the roof!
Check your loft ladder to see how wide it is. Loft ladders are designed to fit in-between standard roof beam sizes. Finally, the location must have enough room to fit the entire ladder and leave a small space around it for movement.
2. Create an Opening in the Loft / Alter the Current Opening
Once you have chosen a suitable location, we advise scanning the surface using a stud detector. A stud detector can check for any wires, cables, pipes, and other obtrusive objects on the loft floor. If the area is clear, you can create your hole.
View this post on Instagram
First, mark out the area using a pencil and ruler (always check the dimensions of the ladder assembly first). You may use a square or angle measure to ensure flush 90-degree corners. Once marked, create a series of pilot holes using your cordless drill at the four corners. The holes should be big enough for your type of saw to fit through.
With pilot holes in place, you can saw the outline of the hatch and remove the piece of wood/ceiling. You may want to sand the edges of the exposed ceiling and any joists to prevent splinters.
3. Install the Wooden Frame
With the new hole created, you must install a wooden frame to neaten the entry and also give support for the loft ladder to hang from. The wooden frame is screwed into the existing joists and beams in your ceiling – this is how the loft ladder is secure.
You will need to cut two pieces of planks the same length and size as the hatch opening. Only two are required as the other sides of the hatch should be aligned with two existing joists. You can then screw the timbers in place using the 50mm screws. Screw both into the existing joists to form a strong connection.
With the basic shape of the hatch created, you can also attach thinner strips of finishing wood to make the loft hatch look presentable. To attach these strips, you can hammer them in place using the 50mm oval wire nails.
Important Tip – If your loft hatch will cut through two or more ceiling joists, it is advisable to contact a structural engineer or loft specialist. This way, a professional can check if the integrity of your loft or ceiling won’t be compromised.
4. Fit Supports for the Ladder
With your hatches and frame created, the job is nearly done. You can now position the supports that the ladder will rest on. The types of supports can vary so we cannot give an exact guide for this step. However, in most instances, the metal supports are attached to or above the wooden frame you have created.
Always read the instruction manual that comes with the ladder – this should provide full details of the supports, and how they are fitted. Regardless, always check the length of the frame and the type of supports – you must double-check you have them in the correct place and test the position of the ladder when the supports are fitted. This way you can ensure it will unfold correctly.
5. Install the Loft Ladder
Finally, you can attach the ladder to the supports. Generally, the ladder is attached directly to the frame or the supports using nails. Again, the position and other details of the ladder installation should be detailed in the instructions that came with the delivery.
New loft ladder and hatch. pic.twitter.com/r589rgZoAT
— Handy Man (@oddjobshm) April 25, 2014
Once done, we advise checking the headroom to ensure it is at the correct height. Also, check the position of the ladder once it is unfolded – make sure you can climb it easily, and that it touches the floor below securely to form a solid connection.
Are Loft Ladders Safe?
When they are installed correctly, yes! Mechanical loft ladders have various safety mechanisms to prevent them from falling down on top of the user. However, exercise caution when climbing a loft ladder.
How Long Does it Take to Fit a Loft Ladder?
Depending on whether or not you have to install a hatch, it could take several hours. We highly recommend having someone there to help you install one of these ladders as not only will you be able to complete the job a lot quicker, but it is also a lot safer should anything go wrong. Never rush a job and if you are unsure, ask a professional.
Finished Loft Ladder project..
Converted hatch from push in to drop down
Installation of telescopic ladder
Adding a handle to the hatch. pic.twitter.com/U9sLvRXVXE— Haider Al-Rekabi ????☠️ (@HaiderAlRekabi) February 22, 2021
What Is the Maximum Weight Loft Ladders Can Hold?
This varies by manufacturer, model, and product size. Typically, these ladders have a maximum weight capacity of 175kg, which is standard.
Final Thoughts
Knowing how to install a loft ladder is not something that everyone will need in their lives. However, if you ever find yourself needing access to your loft space, then you will the information we provided to be quite handy.
Always consult a professional if you need to alter your ceilings in any way and it’s best to hire someone if you are not confident in completing such a big job alone.
Additional Resources
Paul is the type of person who never met a problem he couldn’t fix. He can always be found tinkering with something in his house, even if it isn’t broken! His tips and tricks are often shared on our site. He’s the one you call when something breaks because he has been known to improvise fixes for everything from leaky faucets to malfunctioning dryers.