
The Bissell ProHeat is an excellent carpet cleaning tool, especially when it is running at its top performance level. To perform routine upkeep tasks at home, like deep cleaning or minor repairs, you will first need to know how to take apart a Bissell ProHeat carpet cleaner. Fortunately, this can be pretty easy, as long as you know what you are doing.
Regardless of why you wish to take apart your Bissell ProHeat, search no further because this handy How-To article paired with useful tips should help you perform the task like a professional.
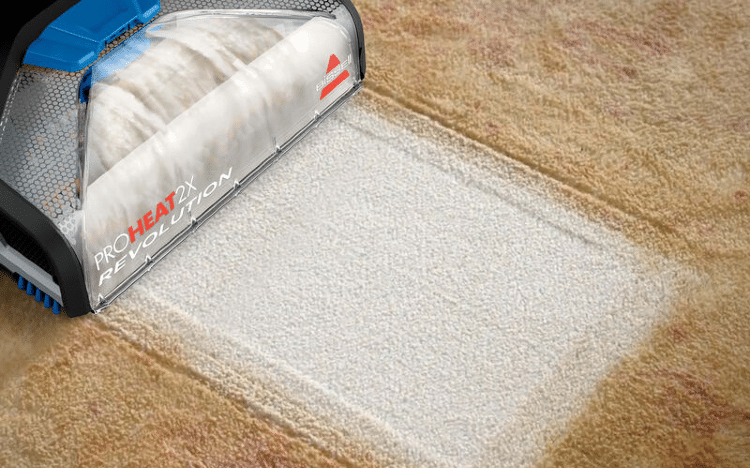
These instructions can be used for both the Original Bissell ProHeat and the Bissell ProHeat 2x Revolution.
Reasons to Take Apart Your Bissell ProHeat Carpet Cleaner

There are several reasons you may want to take apart your Bissell Pro Heat or Bissell ProHeat 2x Revolution.
If you find your machine is running hot, or just not working like new, taking it apart could help you locate the issue.
You should also disassemble your machine occasionally to perform a good cleaning on its major parts. This will prevent debris and pet hair from building up in smaller crevices and ideally promote a longer lifespan for the motor overall.
Routine maintenance and minor general repairs may also lead you to want to disassemble your ProHeat cleaner. The ability to perform these repairs at home could lessen your expenses, as long as you can first make sure you know how to open up your machine.
In general, just remember that disassembling your machine is often an effective way to improve its functionality and keep it running as smoothly as possible.
Getting Prepared
Before you start disassembling your ProHeat carpet cleaner, whether it is the Original or the ProHeat 2x Revolution, there are a couple of things you should do to make sure the process goes off without a hitch.
Before You Start
You will also want to make sure that your carpet cleaner is turned off and unplugged before you begin taking it apart. Even though this appliance may be small, you still run the risk of electrocution/risk of an electric shock and we want you to be safe.
Lastly, empty any liquids inside the machine, even if it is just clean water. An empty tank will help to minimize spills and allow you to examine all of the parts without interference.
Gather Your Supplies
First, make sure you have the tools needed to perform the task. Otherwise, you won’t get very far.
Required:
- Phillips head screwdriver
Recommended (optional):
- Flathead screwdriver
- Needle-nose pliers
- Small tub or bag to save any screws you take out
You may not need the optional tools but we find using a flathead screwdriver to pry open parts or pliers to grip parts that resist coming out can be extremely beneficial, especially if your machine has not been cleaned for quite some time.
How to Disassemble Your Carpet Cleaner Like a Pro
1. Remove both the water and recovery water tank.
First, pull to lift and remove the water tank on top. Then, hold the handle while you press the latch allowing you to unlock and pull out the recovery water tank below as well.
2. Unwrap and release the hose from the back.
Next, you will want to turn the unit around and unwrap the machine’s hose located on the back. Release the latch holding the hose securely in place to complete this step.
3. Remove the tools.
On the back of your machine, you will find a tool caddy holding items like a brush, remove these items, and put them to the side.
4. Remove the lower hose rack.
Pull the lower hose rack out of the unit using a sliding motion. Next, use the Philips head screwdriver you have ready to remove the screw on either side so you can completely remove the rack from the machine.
5. Unscrew the nozzle.
Next up is the nozzle. Unscrew the spray nozzle, located on the front, and proceed to lay the unit on the ground with the power cord located on the bottom, near the floor. This will help you access difficult to reach places while also making sure it doesn’t tip over while you fiddle with the parts.
6. Remove the clear cap.
Next, to remove the clear cap located on the end, you will need to locate and remove all of the black screws surrounding the piece. After this is done, you should be able to easily lift the clear cap off.
7. Remove the pivoting arm.
Lastly, remove the newly exposed silver screw to release the pivoting arm. Once you remove the screw you will have successfully gained access to the internal brush rolls and the belt. Both the belt and brush portion can easily clog with pet hair and other larger debris. Often, completing basic maintenance to these parts could be the solution to your machine’s problem.
Remember: Use needle-nose pliers or a flathead screwdriver to pry apart any parts that are giving you trouble during the disassembly process. Also, be sure to remember where you took any screws from so you can put them back in the correct place.
Other Things to Consider
Now that you already know how to take apart a Bissell ProHeat carpet cleaner, regardless of whether you find the problem that prompted you to take apart your Original ProHeat or ProHeat 2x Revolution, we recommend taking advantage of the situation and making sure you clean and rinse each part.
How Do You Know When It’s Time to Clean Your Bissell ProHeat?

Often, problems arise with machinery when it becomes dirty, and this includes your Bissell ProHeat. So if you are wondering, how do I fix the sprayer on my Bissell carpet cleaner? You may just need to clean it really well. A good cleaning can improve suction from the base and allow it to filter debris better, just like new.
If your machine starts to make an unusual noise, becomes hot, or perhaps its suction isn’t good and it’s not able to lift pet hair like it used to, these are signs it could benefit from a proper cleaning.
We recommend clean water and soft cloths to rinse and wipe down your carpet cleaner‘s parts. You can also use a cleaning solution for parts that are extra dirty, like the water tank, the brushes, and the nozzle.
Conclusion
Now that our guide has come to an end, we hope you know how to take apart a Bissell ProHeat carpet cleaner. With this information, you may be able to save yourself some time and lessen your expenses when it comes to routine maintenance and minor repairs in the future. You may also be able to prevent these issues from arising by simply performing routine deep cleanings at home. So what are you waiting for? Go and put your newfound knowledge to use!
Additional Resources
Emily is a woman of many talents. She has a B.A. in English and enjoys writing. Emily loves accessorising her home with quality products that not only serve a purpose but also enhance the overall convenience and tranquillity of her living space; there’s nothing like coming home to your own personal sanctuary after a long day! She loves anything that can make life easier or more comfortable—from dishware to furniture to lighting fixtures.