
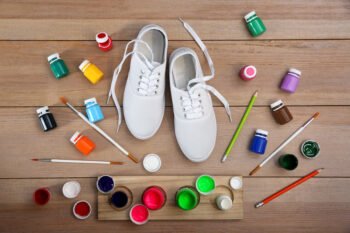
While it may not be commonly known, you can paint just about anything made from leather. You can paint leather shoes, leather furniture, leather clothes like jackets and belts, or even car seats. Painting leather is a great way to upgrade your furniture style, add decorative detail, or restore any well worn previous surface to its original beauty.
The process of painting leather is pretty straightforward, but there are a few important considerations to consider if you want to get long-lasting results. Whether you are considering painting finer details or simply want a new look overall, this article will teach you how to paint leather using the best method possible.
Before You Begin
What Kind of Paint Do You Use on Leather?
I just finished painting this leather Frankenhooker bag ???? pic.twitter.com/mzazxHcMbT
— A. S. Noakes (@AmysDarkArts) May 21, 2022
Can you paint leather? If you have the right supplies, absolutely! In fact, there is special leather paint that is more than equipped for the task. Leather paint is formulated to not only stick to leather but will also be flexible enough that it won’t peel or crack over time.
It may be tempting to simply use craft paint or another paint you already have on hand, but painting leather with acrylic paint designed specifically for this purpose will give you a more professional and long-lasting look in the end.
What Will You Need to Paint Leather?
Other than the paint and a leather surface, you will need a few more paint materials to successfully get the job done.
What You’ll Need:
- Dish soap and rag (in case you need to clean your leather first)
- Deglazer
- Cotton rags or cotton balls (for applying deglazer and finisher)
- Leather acrylic paint in the desired colour
- Flat or foam paint brush
- Small detail paint brush (optional)
- Acrylic finisher coat (glossy or vinyl sealant)
- Drop cloth or newspapers
- Painters tape or scrap paper (optional to keep paint off from certain areas)
- Liquid shoe polish (optional)
- Waterproof spray or finisher (optional)
Painting Leather in 12 Easy Steps
Step 1: Prepare the Area and Supplies
Place drop cloths or newspapers on the floor beneath the area you plan to paint. This will help protect the other surfaces in your home and prevent a messy cleanup.
Step 2: Prepare the Leather
Once your area is prepared, you will want to prepare the surface of the leather piece you are painting.
If you are painting leather furniture, take off any tassels or removable legs. For shoes, remove shoelaces.
Before painting on leather, you also need to clean any visible dirt off the surface. Wipe the leather clean with a small amount of soapy water and a household sponge or damp cloth. Take care not to saturate the material. Then, wait for it to dry completely before moving on.
Step 3: Apply Deglazer
Next, take the finish off of your leather piece with a deglazer. Removing the glaze will help the paint adhere better. If you are painting something with a more natural leather look like suede, this step may be unnecessary. Read and follow the instructions on your specific leather preparer and deglazer product.
Rub the deglazer on your leather using cotton balls or a cotton rag. You shouldn’t have to apply too much pressure as the chemicals will do most of the work for you; however, make sure to rub hard enough that the finish starts coming off. Some of the leather dye colours may also come off with the finish, but that is normal.
There are alternative deglazer options like rubbing alcohol, nail polish, or lemon juice, but these could damage your leather, so we recommend using a professional product.
Step 4: Leave Leather to Dry
Allow the leather to dry for about 15 to 30 minutes, possibly longer if you had to use a significant amount of deglazer.
Step 5: Prepare Your Acrylic Leather Paint
While the leather dries, mix your paint colour if needed and check its consistency on a piece of paper. Ideally, you want a thin consistency that enables you to easily paint thin layers. Add a couple of drops of water if it is too thick, and continue testing paint swatches until you get it right.
If you are painting detailed work, you can also take this time to plan out the design and create guidelines. Feel free to sketch your design directly on your piece of leather.
Step 6: Protect Non-painted Areas With Tape
Actually testing leather painting on old old shoes#art#painting#sneakers #leatherpaint #Angelus pic.twitter.com/IxSsdVqDSA
— Mr.Costard (@Mosieur_Costard) March 14, 2021
Before applying any paint, use painter’s tape to cover any sections or separate leather parts that you want to keep paint-free – this will help a lot if you plan on painting multiple colours on one piece of leather. You can also use paper or plastic for covering legs on furniture and other larger areas. If you are painting shoes, we recommend covering the edges of the soles with tape.
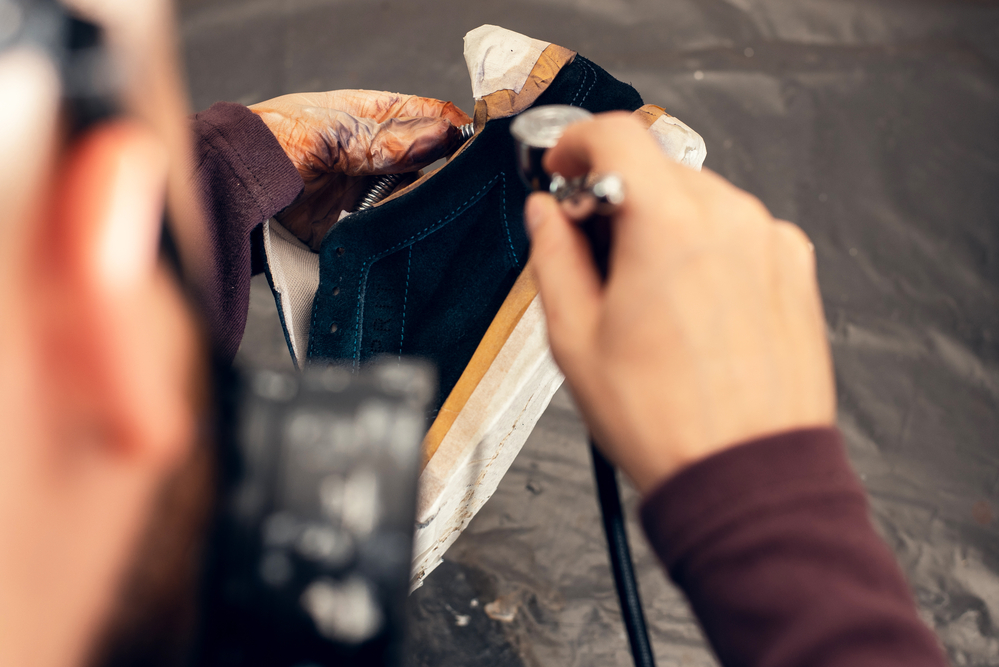
Step 7: Apply a Thin Layer of Leather Paint
Now it is time to finally start painting. Using a flat or sponge brush, apply thin strokes and even layers of leather paint to create a more uniform and consistent final result. Take care not to use too much paint, or it can lead to premature cracking and peeling over time.
Use a small detail paintbrush to help fully cover seams and creases in the material as needed.
Step 8: Allow Paint to Dry
When an even coat has been applied, let the leather paint dry again. This will most likely take about 15 to 30 minutes. When it no longer feels sticky, move on to the next step.
Step 9: Repeat the Application Process
Repeat steps #7 and #8 until your leather is completely covered and an even colour has been achieved by your paint application. Typically, it takes about three to six paint coats to reach a solid colour. After applying multiple coats, move on to the next step.
Step 10: Let Painted Leather Dry Thoroughly
Once you have applied three coats or more, leave your newly painted leather to dry for at least 24 hours or more. While it may feel dry in just a couple of hours, it is best to leave it for longer so that the base layers can dry completely.
Step 11: Apply Acrylic Finisher
When your leather finishes drying, apply an acrylic finisher using either a rag or brush. Read and follow the instructions for your specific finisher, but you will want to again, apply an even and thin coat.
Step 12: Finishing Up
To complete the leather painting process, all that is left is to leave the leather to dry for another 24 hours or longer and clean up your mess. Make sure to clean your sponge brush right away before the paint has time to harden on the bristles.
After the drying process is complete, you may also want to apply liquid shoe polish or shoe cream when painting leather shoes. Shoe polish will help newly painted shoes withstand cold weather and will also rehydrate the material.
You can also finish up with a waterproof spray or finisher if your leather will be exposed to outdoor elements or you want an added layer of protection against spills.
What Will You Paint First?
Now that you know how to paint leather, do you have any potential projects in mind? Do you have a dining bench you want to upgrade? Or, would you like to add a decorative pattern or lettering to a piece of leather?
Either way, you now have all the information needed to start leather painting like a professional. Just remember to apply thin coats of paint and give your leather plenty of time to dry, and you should be all set.
Try it out, and let us know how it goes in the comments below. We are looking forward to seeing your brand new painted leather project!
Additional Resources
- How Long Does Wallpaper Paste Take to Dry
- How to Paint Corners
- How to Waterproof Wood
- How to Remove Paint From Concrete
- How to Hide Bad Walls Without Paint
Emily is a woman of many talents. She has a B.A. in English and enjoys writing. Emily loves accessorising her home with quality products that not only serve a purpose but also enhance the overall convenience and tranquillity of her living space; there’s nothing like coming home to your own personal sanctuary after a long day! She loves anything that can make life easier or more comfortable—from dishware to furniture to lighting fixtures.