
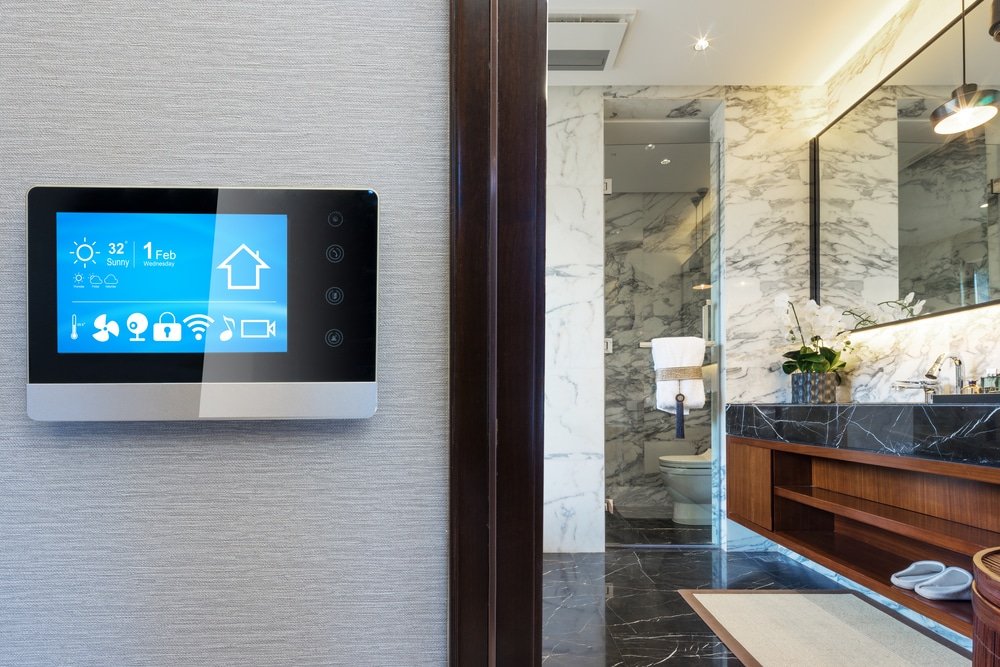
Smart thermostats offer an excellent way to save money on your bills, as well as improving your comfort levels at home. Controlling your thermostat remotely via your smartphone allows you to turn on, off, or adjust your home heating and cooling levels as necessary.
Smart thermostats are also very easy to program. Smart learning models even adjust to your schedule with almost no programming required. Thankfully, installing it is surprisingly easy. If you want to make the change but are worried about what exactly it entails, read on for our guide on how to install a smart thermostat.
Step-by-Step Guide to Installing a Smart Thermostat
Before you get started with installing a smart thermostat, make sure that you have carefully read through your model’s installation instructions. Exact installation steps can vary slightly from one model to the next and will also depend on your old thermostat. Provided you take your time and follow our step-by-step smart thermostat installation guide, you should have yours up and running in 20-30 minutes. Remember, different products may have different requirements so be sure to ask for help if you are not sure.
View this post on Instagram
What You Will Need
You will need the following items to install your new thermostat, so make sure you have them on hand.
- Pencil
- Drill
- Screwdriver
- Pliers
- Smartphone/tablet
Step 1: Turn Off the Power Supply
To avoid damaging your system or injuring yourself, you must switch off the power supply to your boiler, HVAC system or any elements that are regulated by your thermostat. Note, if your old thermostat uses batteries, it may appear to be on even though you’ve cut off the power at your circuit board. If you have your doubts, try running your system to check that it is off.
Step 2: Note the Current Configuration
With the power safely switched off, remove the cover from your existing thermostat. Depending on your existing configuration, there could be several wires, although you will normally see at least two. To make installation as simple as possible and to avoid any mistakes, use your smartphone or tablet to take a photo of your old thermostat with the wires in place as a reference point later on.
I managed to successfully install a smart thermostat today and I feel that qualifies me for an honorary electrical engineering degree
— Lance Conzett (@LanceCo) June 3, 2018
Step 3: Disconnect the Thermostat Wires
Remove the thermostat wires by loosening the terminals with a screwdriver. Once you’ve disconnected the wires, you can then unscrew your previous thermostat from the wall. Place your old model to one side. It is worth keeping hold of it until you have everything up and running, should you run into any difficulties, you can always reinstall your old one thanks to the photo you took earlier.
Step 4: Attach Your Thermostat Mounting Plate
Pass your thermostat wires through your smart new thermostat mounting faceplate and proceed to screw the unit on to your wall. You’ll want to make sure that it is straight, so place your mounting plate on your wall and carefully mark the location of the screw holes before you start drilling. If your previous thermostat was larger or differently shaped, you’ll want to fit a trim plate for a neat and tidy finish.
Step 5: Connect Your Smart Thermostat
Depending on your wiring configuration and HVAC or boiler system setup, you may have several different wires to connect. If your new thermostat only requires two wires, you’ll need to identify the control wires – they are usually black or grey. If you have any doubts, refer to the photo you took earlier. Provided you checked compatibility before purchasing your smart thermostat, this should be very simple.
Step 6: Take Care of the Wires
If you have more wires than you need, they could be power supply wires, often blue or brown. Should your new thermostat only need two control wires, insulate the unused ones and connect up the control ones. In case of any doubt, contact your manufacturer’s support team who can advise you on your exact layout. Otherwise, simply connect each corresponding wire with the appropriate terminal.
Went to install smart thermostat at my new house – was just going to tape ends hot (24v) wires – nope. Accidentally touched 2 and would you know my board doesn’t have a fuse. Just ordered a new 240v to 24v transformer. pic.twitter.com/axjxJDUewu
— Tim Smith (@tsmith_co) April 25, 2019
Step 7: Replace Cover and Power Up
If your thermostat takes batteries, now is the time to insert them. In case you are wondering, high-tech thermostats often use batteries in case of power cuts. This ensures that your energy-saving programs and connectivity information are not lost, even if your mains power goes off.
Once you’ve installed any batteries, place the protective faceplate over your thermostat, snap it into place and turn the power back on to begin.
Step 8: Configure Your Smart Thermostat
Depending on your model, there will be various steps to configure your internet thermostat for use with your HVAC system and a smartphone app. Follow the manufacturer’s configuration guidance and test how to control your heating and cooling functions remotely.
I was able to install a smart thermostat in the new digs (funnily enough because the system is so old) and boy do I love looking at the data it spits out pic.twitter.com/Mh5oEiUgeD
— luke (@readerr0r) November 27, 2020
Step 9: Set Up Tech Assistant Systems
With your Wi-Fi connection set up and your smartphone controls ready, you can set up various options, such as different heating zones within your house, timers, and high and low temperatures. Some models can also be used with home tech voice assistant systems, such as Alexa, Google or Siri.
Step 10: Let Your Device Learn From You
Models like the Nest Learning Thermostat can learn from your schedule to optimise your home heating and cooling levels. These types of smart thermostat automatically adjust the temperature in your house to save you money, although you can also control them remotely if you have any changes to your usual routine. You will need to give this type of unit a little time to adapt to your home’s schedule.
Can I Install a Thermostat Myself?
Yes! You can install a thermostat yourself.
Did I really install a smart thermostat? Look at me ????
— Erik Acosta (@erik86420) June 12, 2020
Going DIY
Provided you ensure compatibility before purchase, it is very easy to install a WiFi thermostat, even with limited electrical knowledge. If you don’t feel confident or are a little worried, cut the power and take a look at your current thermostat’s wiring. Then check out the installation instructions for several compatible smart thermostats – with products that are very similar in layout.
Asking Help From a Professional
If you have a very complex smart home layout, you may prefer to get a professional electrician to carry out your thermostat installation for you. However, don’t be afraid to contact the manufacturers of your smart thermostat’s customer service to ask for advice first. They could provide you with valuable information and assistance to help you with the installation process and clarify any doubts.
Since I plan on staying in my next place for a while, I’m gonna buy a new shower head and a smart thermostat and have maintenance install them for me ????
— ???? (@TheUrbanCarrie) March 10, 2021
Is it Dangerous to Self-Install a Smart Thermostat?
Provided you always switch off your power supply and pay close attention to the wiring, connecting the correct wires to the correct terminals, fitting a thermostat is not at all dangerous.
If you have any doubts about your wiring or WiFi thermostat compatibility, we advise you to stop installation before removing your existing thermostat. Take a photo of your thermostat wiring system and send it to the customer support unit for your new smart thermostat. They will be able to tell you exactly what to do should your home have an unconventional setup.
Make the Change
Smart thermostats are an excellent way to make savings on your energy bills, as well as being better for the planet. If you’re hesitating about making the change, don’t let installation put you off. Provided you check compatibility before ordering, learning how to install a smart thermostat for your house is surprisingly easy. What’s more, you’ll be much more comfortable coming home to your ideal temperature, without wasting hours and hours worth of energy. However, if you do need any help, be sure to ask for assistance.
Have you had experience installing a smart thermostat? Do you have additional tips and tricks to share?
Additional Resources
Kelly is an expert in consumer product research, which is very important when it comes to finding the most useful and aesthetically pleasing items for your home. This became her passion after finding it very time-consuming to wade through all the product information online.
She has a keen attention to detail which she brings to her articles, Kelly’s goal is to help you find what you need without spending too much time searching for it.