
So, you want to know how to prep exterior wood for paint. Well, you have a few steps to go through to achieve this, but the good news is nothing will prove to be too complicated.
You need to keep in mind only a few things when getting that wood surface ready for a coat of paint, so let’s go through the key steps.
Why You Need to Prep the Wood
You prep the wood in advance for two reasons. These reasons depend on whether you are dealing with a previous paint job or brand new, bare wood.
Dealing With Old Wood
In the case of old exterior wood, it’s probably covered in some flaking paint that’s been there for years, and it looks past its best. Unfortunately, the new paint will not stick so well to that old paint, so the finished job is just going to look shoddy.
There will also perhaps be the issue of this old wood has developed a few cracks or small splits thanks to the moisture and cold temperatures it has been exposed to. Again, you don’t want to go ahead and paint over those cracks as they should be treated.
However, we will cover that when we go through the steps.
Dealing With New Wood
You may be lucky in that the wood you bought has already been pre-treated for it to be outside. If so, then you can skip through a few steps.
Wood stripped back will rot when it’s placed in an outdoor environment and exposed to the weather. This takes time, but it then begins to look tired and eventually needs to be replaced.
So doing the correct prep work on the wood to make it more resistant to the rain, snow or general dampness is important.
What You Will Need
You will need a few items to prepare whatever exterior wood you plan on painting. Thankfully, the list of items is not extensive.
The main tools will include getting that old paint off and fixing any problems with the wood itself. So, we recommend the following.
- Paint stripper
- A paint scraper
- Wood filler and tools
- Sandpaper or sanding tools
As you can see, you only need a few things. So now, let’s go through what you need to do with this whole process.
However, before we do, let’s explain that the same processes can be used, whether you are dealing with windows, exterior doors, or even garden furniture.
Let’s Get Started
Follow the steps below on how to pre exterior wood for paint:
Step 1: Removing the Old Paint
Before you do anything else, you must remove that old exterior wood paint. Chances are the previously painted wood is peeling, and there will be a lot of loose paint. You don’t want to be painting over that, so it needs to be removed.
To effectively clean old woodwork surfaces, you may wish to use either a paint stripper or a paint scraper tool.
So, if you plan on the paint stripper method, then you should do the following steps.
Step 2: Using Paint Stripper on Exterior Woodwork
Paint stripper can smell toxic and contain various chemicals, but this won’t pose a problem as you are working outside.
Paint the stripper fluid onto the paint. You will then need to leave it for some time to allow the chemicals to work. Once they do, it will be easy to scrape off the old paint, leaving a relatively clean and smooth surface behind.
The main thing is that the old paint is no longer there. This gives better adhesion for the new coat of paint that will then be applied.
Step 3: Using Paint Scraping Tools
If the old paints appear to be dried out and peeling off with ease, then paint scraping is another option.
Now, you could use power tools to do this, and it will take seconds. However, that can throw up a lot more dust than you may be happy with. Alternatively, the manual method is also going to be effective.
When scraping these surfaces, you can be pretty rough with them. The aim here is to remove as much of the paint that is flaking off as possible. Don’t worry about going with the grain or anything like that, as there’s another step that needs to be followed after this one.
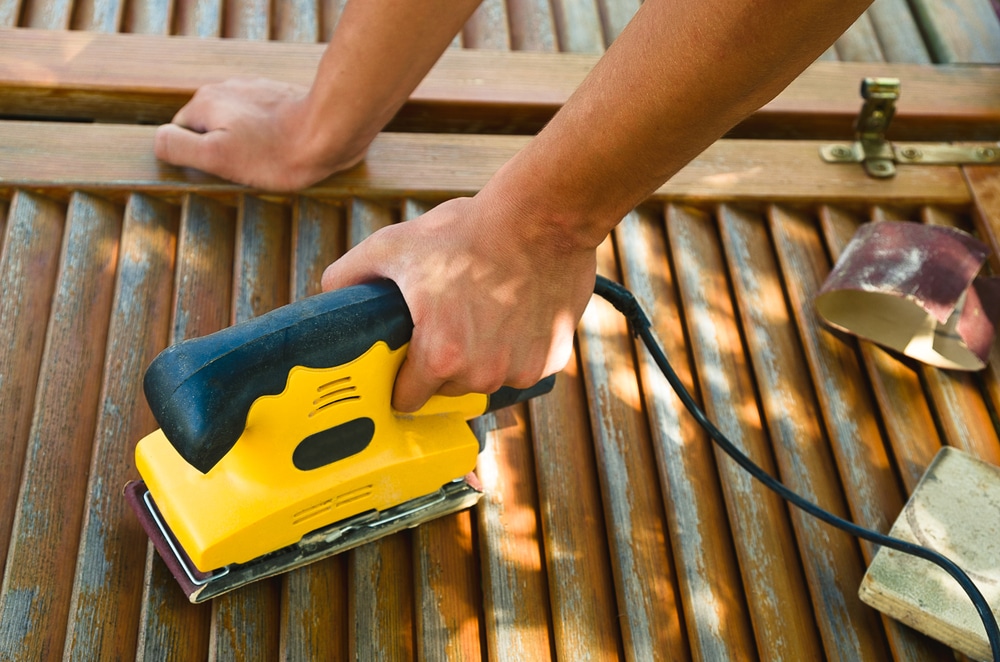
Step 4: Don’t Forget to Sand
You must sand down the wood to remove those last remnants of paint before you look at whether the woodwork needs repairing in any way.
Use medium-grade sandpaper or a sanding tool, and go against the grain to remove the rough stuff. This step isn’t about getting a smooth finish but rather about getting to the point where you can then move onto the preparation of the wood.
Step 5: After Sanding, Examine the Wood
Once you have sanded the wood, examine it. Look for splits, holes, and cracks as you need to get wood filler to repair them.
Pay attention to the edges of the wood and fill any crevices that spoil the end appearance. It’s incredible how easy it is for edges to be chipped, so don’t focus purely on holes.
The problem with woodwork in an outdoor environment is that the conditions will affect the wood over time. So part of the art of preparing wood for painting is making sure it has no weak points, and that’s what you will be doing now.
If there are holes, then use a good quality wood filler to repair the hole. Follow the instructions for the brand you purchase and leave it for the required time to set effectively.
Once you have done this, you may have to sand things down a bit to get that smooth finish.
Step 6: Wipe It Clean
Before you go on to painting exterior wood, you need to make sure it’s clean. So, here’s a tip.
You need to remove any dust from the wood, but don’t add a lot of moisture. Instead, use a dry brush and brush away as much dust as possible. You may want to run over it with only a slightly damp cloth.
Step 7: Get Ready to Paint
All that’s left for you to do is to get that external wood paint and to get going. You have completed the sanding and preparation. You have used filler on problem areas then sanded that down again. So, now you need to paint. But what do you choose?
Choosing Exterior Paint
It would help if you opted for an exterior primer and exterior paint to be applied as the top coats. The primer will give the top coat better adhesion to the surface, so don’t skip using that as the first coat, even on old painted surfaces.
Use quality exterior paints instead of trying to save money, and the same applies to the primer. Poor paint will vanish into surfaces and hardly stain it so that you will be wasting your time.
Priming the Wood
The final point is to stress the need for priming. One coat on outdoor wood will not do. The surfaces will eat up that paint, and you will be left disappointed.
Priming the wood will also help cover up the filler you used on the surface, so don’t forget to do it.
Get Ready to Paint
And that’s how to prep exterior wood for paint, whether your garden fence or your outdoor furniture. By doing all this, you should have perfectly primed the wood in preparation for those topcoats. Now it’s all up to you to take action.
Additional Resources
- How to Install Wireless CCTV at Home
- How to Use an Electric Chainsaw
- How to Make a Table Saw With Fence
- How to Use a Router Table
- How to Use a MIG Welder
Paul is the type of person who never met a problem he couldn’t fix. He can always be found tinkering with something in his house, even if it isn’t broken! His tips and tricks are often shared on our site. He’s the one you call when something breaks because he has been known to improvise fixes for everything from leaky faucets to malfunctioning dryers.