
Building a bird table is a simple and inexpensive way to safely encourage birds to feed in your garden. Whether you have a lot of spare wood to use up or want to make a specific style of bird table, it’s a good project that you can easily adapt to suit your skill level and whatever materials you have available. Besides enjoying the sight of birds visiting your table, you will also create a new decorative focal point for your garden.
Wondering how to get started? Here is everything you need to know about how to make a bird table from scratch, as well as some extra considerations, ideas and helpful tips.
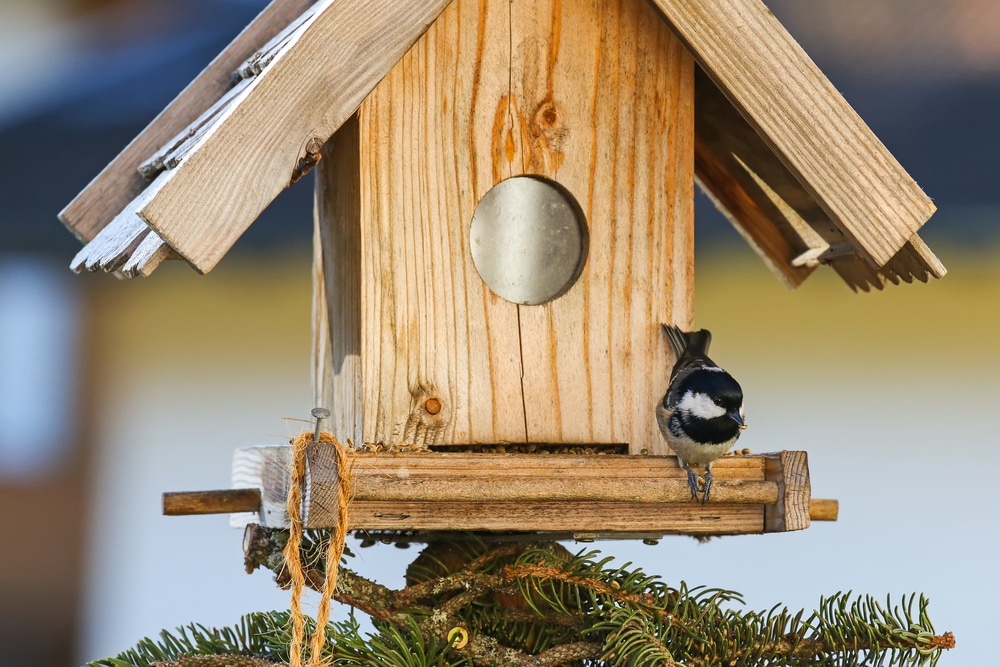
Choose Your Bird Table Design
Before getting started with your bird table projects, you’ll need to spend a small amount of time planning what type of bird table you’re going to build. Consider where you will place your bird table, what equipment you have available and how good your DIY skills are before making up your mind. Here are some ideas to help you to decide.
bullfinch bird I mentioned this morning seeing 1st time ever in my garden was sat on my lounge carpet 15 mins ago, Tilly cat brought it in plonked it on my foot……….but good news was alive, no damage, plonked it on bird table,it flew into Acer tree, now singing away….phew
— James ???????? (@yorkshirebloke_) March 30, 2021
Houses with small, enclosed gardens may benefit from wall-mounted bird tables. You’ll be able to adapt most designs to attach to your fence or wall with an angle bracket and plenty of screws. If you have large trees but no available lawn space for a bird table or if you have kids or pets who risk knocking it over, you may want to suspend your bird table from a tree branch. Hanging bird feeders can be a good choice for shyer bird species.
A post-mounted bird table is perhaps the most popular choice. You can install it wherever you like in your garden to ensure that the birds are happy. What’s more, you can also place it somewhere that you are certain to get a good view. Post-mounted tables will need a good base to ensure stability in windy weather, so if you are thinking of building a traditional bird table, be sure to spend some time planning how to ensure best it stays upright.
Another major factor to consider when choosing what type of bird feeder table is whether you will make a roof or not. A roof will protect from the weather and prevent some birds from feeling overexposed on an open platform. It also keeps your food dry. On the other hand, building a roof makes your very simple bird table a lot more complex. Also, more timid birds may be put off from visiting a bird table with a roof.
While a roof will look nice on your bird table, open bird tables are very practical and favoured by most garden birds. Unless you are confident making a roof for your bird table, sticking to a basic platform style will make your build go much easier.
What Kind of Wood Should I Use For a Bird Table?
Wood pigeon this afternoon.
There were lots of Magpies, in the trees, making a lot of noise. The pigeon stayed quietly for ages, on the bird table, and then flew away.
????
3rd April 21 pic.twitter.com/qf9T0bl3Vl— Anita ⚡❤???????????????????? (@AnitaNorburn) April 3, 2021
One of the most important decisions you’ll need to make when planning your bird table is what type of wood to use. You don’t want to pick the wrong type and end up with a heavily weathered one that’s unfit for purpose in just a short time.
If you are going to take the time to create your very own bird table, it’s important to choose the right type of timber. First of all, make sure that the wood you will use for your bird table is good quality and pressure-treated for outdoor use. It will extend your bird table’s lifespan and ensure greater protection against the elements, fungi and termites.
When it comes down to choosing the actual wood to build a bird table, pine is the most popular as it is readily available and fairly cheap. Plywood is another common choice, especially for the platform and roof, as it is also cheap and easy to work with. However, make sure that you choose exterior-grade plywood.
Otherwise, if you are looking to spend a bit more, cedar, walnut and oak all make good quality timber choices. In short, it all depends on how you want your DIY bird table to look and how much you want to spend. You can also use any solid timber you may have spare for your bird feeder.
Note that if you don’t purchase exterior-grade timber for your project, you may need to improve its weather resistance by treating your bird table when it is completed. We recommend using a non-toxic water-based wood preserve for all parts of your bird table that will come into contact with the birds and their food.
What Size Should a Bird Table Be?
Bluetit coming in to land. Busy Easter morning on the bird table #bluetit #birdtable #backgardenbirds pic.twitter.com/xsVCADbcaG
— Daniel Lock (@DanielLock17) April 4, 2021
Now that you’ve decided on your type of bird table and what it’s going to be made out of, it’s time to focus on your bird table’s dimensions. While you are free to make your bird table to your own specific set of measurements, there are certain sizing guidelines to respect to ensure that more birds manage to use your table safely.
In general, it is recommended that your feeding platform measures around 50cm by 30cm. It is only a guide but bear in mind that birds will squabble if your table is too small, and some species will stay away. On the other hand, a large platform will increase the chances of bigger birds, such as pigeons, feeding at your table. What’s more, larger bird tables are heavier and require sturdier poles, mounting and fixing to prevent them from blowing over.
If you have decided on a pole-mounted bird table, you’ll also need to decide how high it is going to be. Very tall bird tables will appeal less to ground-feeding birds and can also be unstable in bad weather. Low bird tables are easily scaled by pets and are less likely to have as many birds visit. Around 1.5 metres above the ground is a good height for most bird tables.
Lihat postingan ini di Instagram
Step-by-Step Guide to Making a Simple Bird Table
Once you have your bird table all planned and have your materials ready, it’s almost time to start building it. Take a moment to consider what you will need to complete your creation. Read through the following steps to get a good outline of how to make a bird table properly.
Step 1: Cutting
Whether you are using a special bird table design or your own plan, you’ll need to start by cutting each part to the correct size. It is easier with a circular saw, but if you don’t have much DIY experience or much in the way of tools, you could always ask at your local DIY store. They often offer a wood cutting service.
Step 2: Sand Smooth
Before fitting your cut pieces together, it is essential to sand smooth any crevices. It ensures your bird table will last longer and looks better, and provides a more hygienic feeding experience for the birds. Otherwise, seeds, dirt and debris can clog up cracks in the wood, encouraging bacterial growth and possibly contaminating your fresh birdseed. In cold weather, water-filled cracks can freeze, widening and deepening splits further.
Jay feeding on my bird table. pic.twitter.com/MPvmkSyvMI
— Peter D Smith (@PetedsD) April 4, 2021
Step 3: Assembly
Attach softwood battens around the edge of your platform using wood glue and brass or galvanized screws.
Use your drill to make holes before adding the glue and securing with screws. This raised edge will prevent your bird seed from getting blown off, as well as providing the birds with a place to perch. Ensure that they do not join at each corner, as you will need to leave gaps to allow rainwater to drain and facilitate cleaning your bird table. Drill through the platform to add hooks underneath at the edge of each corner for hanging feeders or fat balls.
Attach the platform to your post base (or fence or wall) using angle brackets. With your feeder top firmly attached to your post, you’ll need to focus on securing the base. You can either drive your post into the ground or finish with a cross shape. Drill at the bottom on each side of your post and screw on angle brackets to attach the base. Use nails and bands or screw on wooden wedges to secure each foot.
Some more complex bird table plans will also require you to assemble and mount a roof, perches or built-in feeders on your table. Follow the instructions that accompany your specific bird table design for the best results.
Lihat postingan ini di Instagram
How Do You Get Birds to Come to Your Bird Table?
With your homemade bird table finished and installed in your garden, it’s time to get it ready to attract the birds. Before you start putting out seed for your bird population, we recommend reading through this useful list of ‘Frequently Asked Questions About Feeding Birds’ by the RSPB.
If you have not previously been feeding birds in your garden, you may find it takes a few days or even weeks for them to start to frequent your bird table. Time of year is important here, as they are less likely to start visiting your new bird table when food supplies are abundant towards the end of summer. Your table will likely get visited much sooner in winter and early spring.
Location is also important. Birds will be more confident using your new bird table if it is near to a form of shelter for them, such as small bushes or trees, to which they can easily retreat. Just make sure that these are not dense plants that could conceal cats and make it easier for them to attack birds at your feeder.
A good varied selection of food will encourage a wider variety of birds to feed at your table. As well as seeds and peanuts, you should also add some live insects such as mealworms. A small container of clean fresh water for drinking and bathing will also be appreciated, especially during very cold and hot spells.
???? Dad built me a bird table ???? pic.twitter.com/nCLtADEoAX
— Emily-Rae Maxwell (@emilyraemaxwell) April 3, 2021
Build Your Own Bird Table
Feeding your garden birds is important to local conservation. You can even save lives during cold spells while watching songbirds feeding in your garden is a relaxing experience that can help promote a well-being feeling. Building your own wooden bird table can help make watching birds from your window a lot easier and more pleasurable. It is also an inexpensive way to decorate your garden while brushing up on your basic DIY skills.
Have you ever made a bird table? Do you have any tips for us? Let us know in the comment below.
Additional Resources
Kelly is an expert in consumer product research, which is very important when it comes to finding the most useful and aesthetically pleasing items for your home. This became her passion after finding it very time-consuming to wade through all the product information online.
She has a keen attention to detail which she brings to her articles, Kelly’s goal is to help you find what you need without spending too much time searching for it.