
Office chairs are an essential item in any workplace. They provide comfort, help improve your posture and allow you to work without placing stress on your body. They are also easy to disassemble compared to other office equipment.
This article looks at how to disassemble an office chair, taking you through a step-by-step guide. We’ll also look at the main reason behind the choice of dismantling a chair and at further considerations to make before embarking on this task.
Why May You Need to Dissasemble Office Chairs?
You may be wondering why anyone would want to disassemble parts and potentially ruin their office chair. Why indeed! There are many reasons for disassembling an office chair, and we have listed the most common ones below:
- To move the chair easily into a different office
- To pack the office chair away and move it to a different premises
- To replace worn out parts
- To try and determine a fault with the office chair
Firstly, office chairs are difficult to move and transport due to their irregular shape. If you are moving into an office with many stairs, it may be quicker and easier to disassemble some parts instead of lifting the whole chair.
Also, breaking down an office chair into its parts would make it easier to pack away and transport if you were moving to completely new premises.
Aside from ease of movement, the other main reason is chair repairs. Office chairs can be prone to breaking – hydraulic lifting mechanism included. Not to mention that different parts, such as the backrest or seat, can get worn out over time. As a result, you may need to disassemble office chairs to replace parts or troubleshoot mechanical problems.
Considerations to Make Before Dissasembling an Office Chair
We are nearly there. But first, there are some crucial considerations to make. It’s not a simple case of diving straight in and dismantling your chair!
Take Some Pics of How It Looked Before!
The worst thing possible is to dismantle a chair and make minor adjustments, only to forget how the parts fit back together!
It is therefore advisable to take photos of the chair beforehand. Photograph the different parts, including their fixture points. This process may take a little time; however, you will save time and effort in the long run. When reassembling the chair, you can refer to the photos – simple.
Only Disassemble the Necessary Parts
You don’t need to take apart the entire chair if you only have to replace or fix one single component. Office chairs have the benefit that their different parts are not interconnected, meaning that you can disassemble specific parts without affecting the entire structure.
For example, you can disconnect the headrest without needing to touch the armrests.
As a result, only disassemble all the necessary parts and nothing more! This will save you time and effort.
Are the Effort and Cost Involved Worth It?
Lastly, it is essential to think about the process and if it is warranted.
Sometimes, it may be more cost-effective to go to an office furniture dealer and buy a new chair. Let’s say that the metal cylinder and lifting system are entirely broken. These are generally the most expensive part of office chairs. As a result, trying to fix and/or replace it may be a lost cause.
In contrast, perhaps one of the armrests is damaged. This should be a relatively effortless fix, and you could easily get a replacement armrest. In this instance, taking the time to dismantle the chair and replace the part is a good idea.
Always think about the situation, what is involved, and if replacing the office chair would be a better option for you.
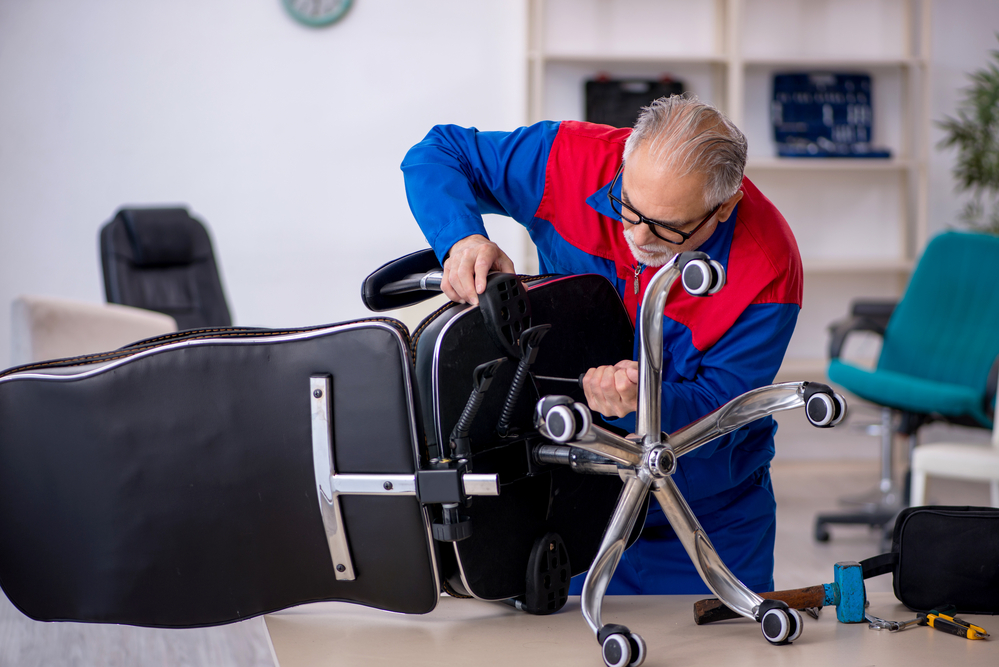
How to Disassemble an Office Chair – A Simple Guide
We can now look at the process of disassembling office chairs. Please be aware that this process could be vastly different depending on the style and design of your chair.
Most chairs for office use have similar components, including a headrest, backrest, armrests, a seat base, a hydraulic cylinder, and another base with wheels. However, how the whole unit and parts are fixed together could be different.
Step 1: Read the Manufacturer’s Instructions
Before starting any work, always read the manufacturer’s instructions. Hopefully, whoever bought the chair kept the instructions!
The instructions may contain diagrams of how the different parts fit together. It may also contain important information about ordering replacement parts and what to do if parts like the gas cylinder break.
Also, we advise clearing an open space in your office so you can work safely.
Step 2: Remove the Armrests
The armrests are one of the most straightforward items to remove. However, they are not always necessary to remove. Remove the armrests if you need to transport the chair more quickly or if they need replacing.
Most office chairs have the armrests either slotted into the base or fixed into it on a metal plate.
You may be able to pull the rests out without the need to loosen any bolts. However, if the armrests are fixed to the chair base plate, you will need to unscrew the bolts while holding the rests, so they don’t fall.
Step 3: Remove the Headrest
Similarly to the armrests, the headrest may not need to be removed. In most chairs, the headrest and backrest are connected, forming a single unit structure.
If you can remove it, you can essentially follow the same procedure as the armrests.
In most instances, the headrest slots into a tube on the backrest, so you should find it easy to pull it out. Alternatively, it could be secured to the backrest via a metal plate. If that’s the case, simply unscrew all the bolts with a cross-head screwdriver or wrench and pull the headrest free.
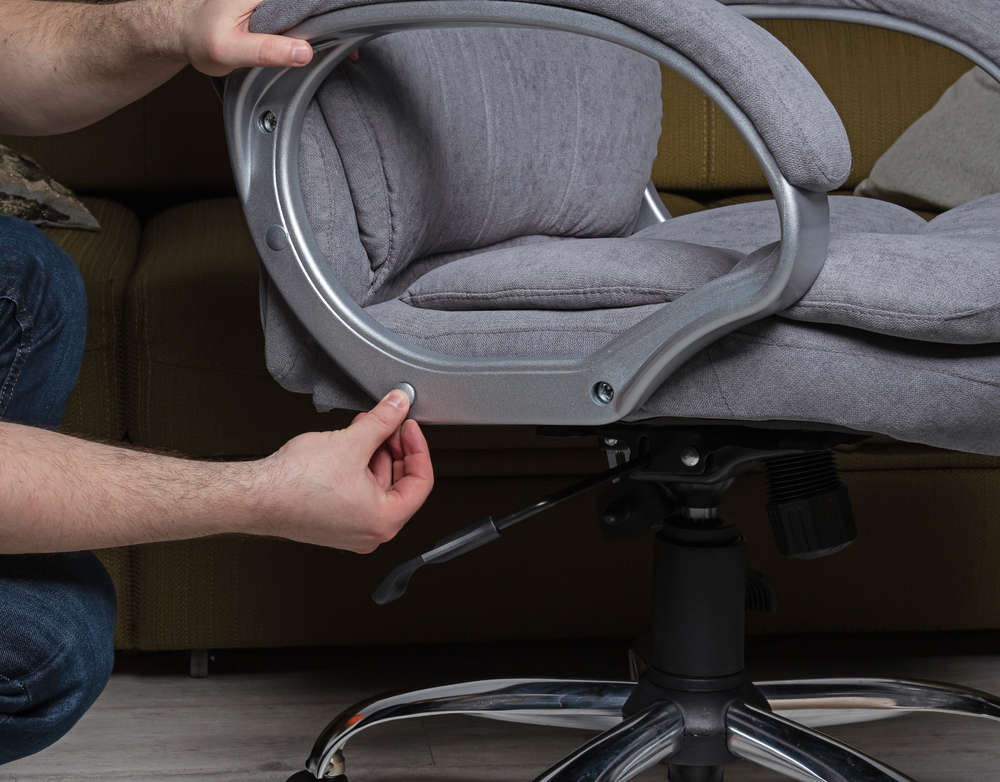
Step 4: Remove the Backrest
Removing the headrest before the backrest can make it easier to carry and fit through an office door. With the headrest detached (if possible), you can then release the backrest.
You should find that the backrest will slot directly into the chair body, typically into the starbase at the rear. Usually, there is a plate underneath the starbase that the backrest is screwed into. There will also be multiple screws as a secure connection is required to keep the backrest stable and support your back properly.
Depending on the type of fixture of your chair, you may need to use an Allen wrench, Allen key, adjustable wrench, or flat head screwdriver. It may also be easier to turn the office chair upside down so that you can access the connecting plate easier.
Step 5: Remove the Wheels Individually
Chair castor wheels are incredibly easy to take apart. As with the other smaller components, think first if it is essential to remove them.
You should not need to remove the wheels from the five-star base in most cases. They are relatively small and do not take up much more space. The only instance where you would need to remove them is if they are jammed and won’t slide properly, or they are broken.
With the base upside down, the castors should pop out of the legs. Twist and pull them towards you, and they should ease out eventually. To keep them safe and make sure you don’t lose them, place them in a sealed bag.
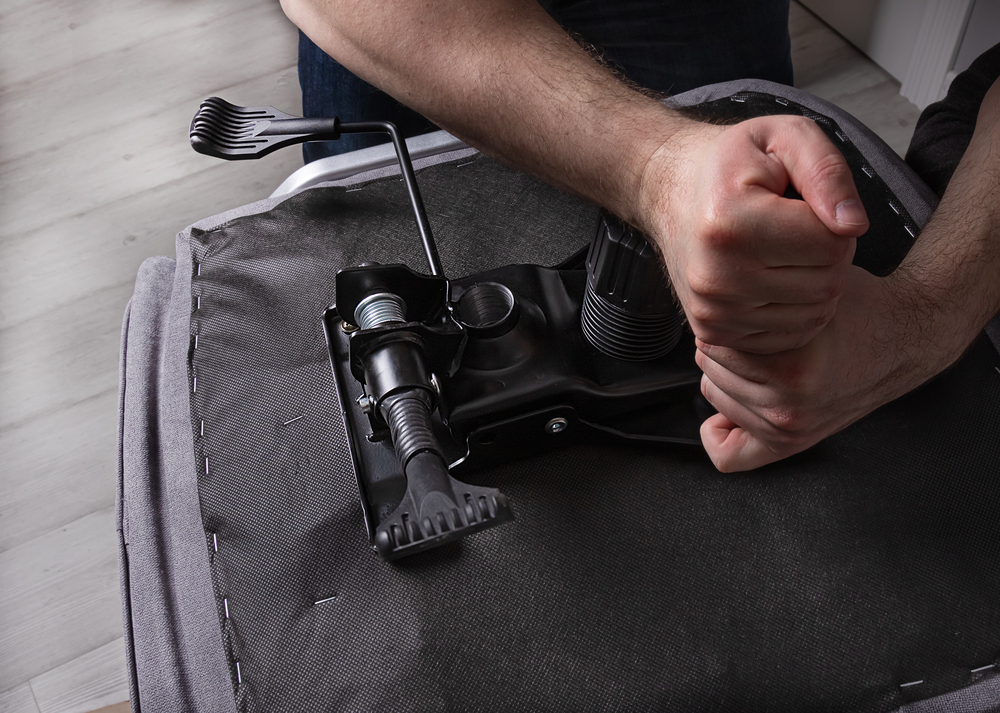
Step 6: Remove the Office Chair Base
The actual base of the office chair usually has three components – a starbase (the legs), a seat pan, and a seat pad. The initial step is to remove the seat pad. Usually, this is secured into the base via a series of bolts. You may have to use an Allen wrench or adjustable wrench to loosen them and remove the pad.
With the pad removed, you can then look at pulling the upper part of the base (the seat pan and frame) from the gas lift cylinder section: this may simply pull out with a bit of force. However, it depends on how the gas lift cylinder is connected. You may need to use a pry bar to help ease the base out of the cylinder tube.
Once you have removed the seat pad and seat base, you should only be left with the legs and the cylinder system, which is used to lift and lower the office chair.
Step 7: Remove the Office Chair Cylinder
You must take extra care when removing the cylinder system. It can easily be damaged, affecting your chair’s entire mechanism. The cylinder system inside typically uses pneumatic technology and thus uses compressed gas, which can cause problems if it escapes.
Before unscrewing the cylinder, we advise placing some masking tape around the part that you will unscrew. This precaution will help protect the metal and prevent it from getting scratched.
Once covered, use a pipe wrench at the bottom of the mechanism and turn it until it comes loose. Eventually, the cylinder should come free, and you can gently separate it from the base. You may also need to use a rubber mallet if it is stuck fast: gently hit the cylinder with it until it dislodges from the base.
Office Chairs FAQs
Is It Safe to Disassemble an Office Chair?
Yes! However, as with any DIY task, you must take care, be patient, and take things slowly. There are multiple pieces to work with, and some of the metal parts are heavy. Be careful when lifting the parts and observe correct lifting methods. Also, disassemble all components slowly to avoid trapping your fingers in any loose parts.
Will You Void the Warranty if You Disassemble Office Chairs?
The validity of your warranty typically depends on the overall condition of the chair. If you break something by your own error, the warranty is most likely void. That might well be true if you also do not visibly damage a component, but the chair doesn’t properly work when putting the parts back together. This is why it is important to read any warranty terms fully.
Do You Need Two People for the Whole Process?
It depends on the size of the office chair. Most office chairs are light enough for one person to disassemble them. Also, you can dismantle parts one by one and therefore do not need to lift the chair too much.
Disassembling Office Chairs Made Easy
We hope you have found this guide on disassembling an office chair useful! As you can see, anyone can perform this process if you have the right tools at hand and a little time and patience.
By understanding this procedure, you can easily disassemble the majority of castor-wheel chairs should the need arise. This includes dismantling them for moving office, or if the chair is broken and needs repairs.
Additional Resources
- Why Should You Get a Gaming Chair
- How Do Massage Chairs Work
- How to Organise Your Desk
- How to Sit at a Desk.
- How to Arrange Furniture in Small Living Room With Bay Windows
Paul is the type of person who never met a problem he couldn’t fix. He can always be found tinkering with something in his house, even if it isn’t broken! His tips and tricks are often shared on our site. He’s the one you call when something breaks because he has been known to improvise fixes for everything from leaky faucets to malfunctioning dryers.