
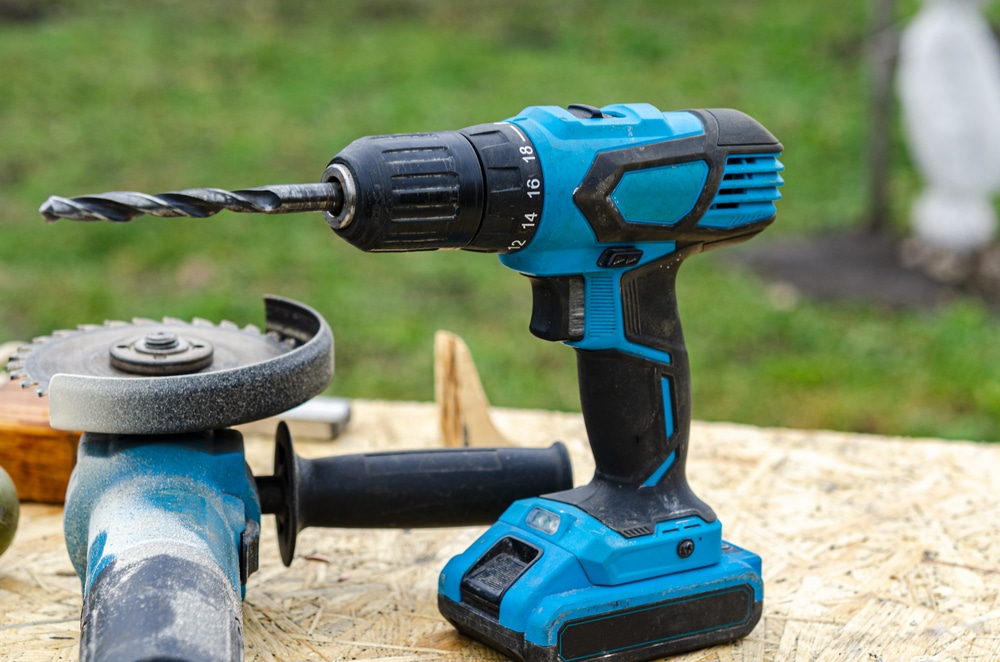
Cordless drills are fantastic power tools that you can use to perform a range of DIY tasks. Whether you need to drill holes for new wall hangings, create pilot holes, or even drive through concrete – these tools are invaluable!
However, they are not infallible! Cordless drills are reliant on their battery and battery charger. You are not connected via a cable to a mains power source. Therefore, if you experience issues with the power supply or charger, you may not be able to use the drill.
For example, let’s say your battery has drained, and you need to charge it. You connect it to the charging station, and nothing happens! The charging unit has died! Disaster. Or is it? As you will see in the below three steps, we look at how to charge a cordless drill battery without a charger.
Charging a Cordless Drill Battery Without Using a Charger
 This may seem ridiculous, but it is possible! Moreover, you can charge a cordless drill’s rechargeable battery without a charger, even if you don’t have much DIY experience or electrical knowledge.
We do, of course, advise that you seek to replace the faulty battery or charging unit as soon as possible. However, until your replacement arrives, you can create a makeshift charging unit using other batteries! Batteries to charge batteries – it’s the future!
Step 1: Prepare the Necessary Equipment
When learning how to charge a cordless drill battery without a charger, one of the most important things you need to remember is that you need another power source. To provide power, you need power. In this instance, you will use the power of batteries to charge your drill battery.
It may sound like a strange concept, but it makes sense. Batteries have a store of power. Therefore, if you can access this power storage, you can transfer it to another battery.
The first step, therefore, is to find a suitable stash of batteries. These batteries must have a charge. Also, you must have the means to connect to them and access their power. Items you will need for this include:
- Electrical tape
- Standard electrical wires
- AA batteries with charge
Electrical tape or insulating tape is relatively easy to find – any DIY or electrical store will sell small rolls of electrical tape. This tape is not essential, but it will help to keep the charging unit held together. Also, you can use any piece of wire providing that it is conductive – i.e. an electrical current can transfer through it.
In terms of batteries, you need enough AA battery voltage to match the voltage of your power tool’s battery. There should be a voltage identification on the lithium battery, or the battery voltage should be readily available in the instruction manual. As a rule of thumb, each AA battery has a voltage of 1.5V. Therefore, if your drill battery has a voltage of 15V, you would need 10x AA batteries (15/1.5 = 10).
Step 2: Assemble the Battery
Once you have all the necessary equipment, you can assemble your charging rig! This is the fun part, and you get to test your DIY and electrical skills!
Charging your drill battery without a charger requires connecting the AA battery to your tool’s battery via a conductive wire. This gives the lithium unit a way to charge as it will draw current from the AA battery. However, you cannot simply connect one AA battery to your drill power unit – it won’t give sufficient power.
You must, therefore, connect the AA batteries in series to create a single unit. Think of it as a battery sausage or a string of batteries connected by wires. The most important aspect here is that the AA batteries must be connected positive to negative. If you connect the AA batteries negative to negative or positive to positive, no current will flow. Also, the connection between the batteries must be firm without any gaps. Otherwise, the current will again, not flow.
Take the first AA battery and connect its positive end to the negative end of a second battery. Make sure the connection is secure, and use the electrical tape to fasten them together – end to end. You must repeat this process and connect each battery subsequently. Each time, make sure that you connect the opposite charge polarity to make sure the current can flow.
Once all the batteries are connected, you should have a chain of connected AA batteries with one end positive and the other end negative.
Step 3: Connect and Charge!
Once you have created your chain, the final step is to connect this to your Li-ion battery. This is the actual charging process and how your Li-ion battery will gain charge. The most important point here is that you must connect positive to positive and negative to negative – the opposite of what you did when connecting the AA battery chargers.
Connect the positive end of your AA chain to the positive terminal of your device. Next, connect the negative end of your AA chain to the negative terminal of your Li-ion battery. This creates the full connection, and the power from the AA batteries should then start to transfer into your power tool battery!
You can hold the connection between the wired and batteries by hand; however, this can be tiring, and it is safer to tape the AA chain to the battery instead. Also, we advise that you always remain present during the charging process. The wires could work loose, a fire could start, or something dangerous could happen. When dealing with electronics, it is always advised to be present so you can react quickly to any change in circumstance.
This process may take a while to get a full charge. However, it is relatively simple, providing you have made a secure connection between batteries and the wires. You should now have a clear understanding of how to charge a cordless drill battery without a charger! As you can see, anyone can complete this process, and it can save much stress and hassle!
Caring for Your Cordless Drill Battery
You now know how to bypass any flaws with battery chargers. Charging your drill battery without a charger on hand is possible, but this is not a long-term solution. Furthermore, it is something that you can avoid in the first place. So you don’t have to spend time creating battery charger rigs. You should always research your devices and their components beforehand.
The following are some simple pointers that can help avoid this situation:
Check Customer Reviews for Reported Flaws
If this appears to be a common issue with a particular cordless drill, don’t buy it! On most sites, you can sort the reviews by star rating and browse through them to gain an overall idea of the capabilities of the drill and its power unit.
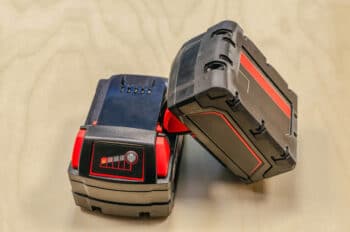
Purchase One or Two Spare Batteries
Even if you have a working charger, it can’t hurt to always have a spare battery pack on hand. As a result, if one battery dies and won’t charge, you can always try the other one!
Maker Pro Tip: Always buy a second battery for your cordless power tools. There's nothing more annoying than getting really into a project, only for your drill to die. (Pictured: the start of the workbench I'm making for my shop.) #makers #propshop #woodworking pic.twitter.com/5f8Mqw7p46
— emet-selchs *snap* (@digimeow_) October 8, 2018
We always recommend purchasing official battery packs from the same manufacturer as your drill. This may be a little more expensive. However, you can ensure that the battery is high-quality and that it will work effectively with your drill and the charger unit.
Whilst some third-party batteries may be acceptable, there is no guarantee they are compatible. Also, you could inevitably void any manufacturer’s warranty if you use third-party accessories such as a battery pack and charger with the drill.
Store Your Cordless Drill and Batteries Properly
Many people leave their power drill and batteries exposed to poor conditions. They then wonder why the device stops working or the battery doesn’t charge! Batteries should be stored at room temperature and not in direct sunlight. Also, keep your battery pack, charger, and drill away from anything that gets condensation.
Check Your Batteries and Charging Unit Regularly
Oftentimes, people leave their devices for months and months in their garage or shed without any interaction. This is a surefire way to let damage creep in. We advise checking the functionality of your drill and drill battery regularly to ensure it is still working. This can allow you to find any flaws quickly.
Useful Tips for Using a Cordless Drill
Now that you know how to charge your power tool’s battery without a charger, we will provide some tips on how to use your cordless drill and make the most of each charge.
Always Use the Right Setting for the Right Job
 Different DIY jobs will require different power settings. It is important to utilise the power settings to ensure you are not overheating the drill or using excessive force and power when there is no need.
For example, you would not need to use the same power setting to create a pilot hole in wood as you would a brick. If you use a higher setting than needed, you risk reducing the battery charge quicker and potentially reducing its longevity.
Don’t Run the Battery Charge Down to Its Limit
It is tempting to try and get every last bit of charge from your battery. However, this can be damaging. If you drain the battery completely, you can damage the poles and shorten the life of the unit. You should, therefore, re-charge your lithium battery with a suitable charger when you start to notice a reduction in power output – not when it’s completely drained.
Don’t Allow Your Battery to Overheat
Batteries and heat do NOT mix. This is a recipe for disaster and, in extreme cases, can lead to explosions, seriously! Batteries are conductive objects that store live electricity. Therefore, if they overheat, they can essentially combust. You only have to touch a battery once used to feel the extreme heat it can generate.
As a result, you must never overheat your drill. Regardless of the kind of drill you have, always take a break between drill sessions and allow your battery to cool down. Also, before using a charger, always let your battery cool down first. You can risk damage to the charger if you place a battery in it that has just been used extensively. Finally, to avoid overheating, do not store your batteries in a hot place.
Cordless Drill Battery FAQs
How long will a cordless lithium drill battery last?
In terms of overall lifespan, a cordless drill will typically last between 3-5 years. This should give you plenty of usages, and you will certainly get your money’s worth!
What type of batteries are used in cordless drills?
Generally, there are three main types of rechargeable batteries for drills – nickel-metal hydride, nickel-cadmium, and lithium-ion. Lithium-ion is considered the best type of battery and usually has the largest capacity.
Should you leave a battery in the charger after it’s fully charged?
No. If you leave the battery in the charger, as it naturally loses charge, the charging unit will top-up the charge. This can reduce the overall longevity of your battery. Most people remove the battery from the charger as soon as it’s fully charged and place it back in the drill.
Can proper battery storage improve their longevity?
Yes! If you take the time to store your power tool’s batteries correctly with the best protection, you can improve their lifespan greatly. Ideally, the battery and charger should be stored at room temperature and not be left exposed to the elements.
View this post on Instagram
Summary
We wish that you are never in the situation where your charger does not function correctly, but if you are, we hope this guide on how to charge a cordless drill battery without a charger has been useful to you; whether it be for charging up a battery or preventing your charger from dying in the first place.
Do you use cordless drills for your DIY projects? How do you maintain their rechargeable batteries? Share your tips in the comments section.
Additional Resources
- What Is a Cordless Drill Used for
- How to Test a Cordless Drill Battery Charger
- How to Use an Electric Screwdriver
Paul is the type of person who never met a problem he couldn’t fix. He can always be found tinkering with something in his house, even if it isn’t broken! His tips and tricks are often shared on our site. He’s the one you call when something breaks because he has been known to improvise fixes for everything from leaky faucets to malfunctioning dryers.
I cannot obtain replacement battery for my drill.The drill is a AEG Asbe 16 electronic. The battery is a12V P12. It is a good drill. Any ideas on getting the drill back in service please.
I’ll step in. As someone who has goofed around with various drills before, including an old NICAD version which this seems to be, I’d say forget the NICAD. They’re junk.
Take a look at the battery connection on the drill and see if there is a way to solder a connection onto the drill or even onto the bad battery casing (Gutted of course).
After determining where to make the wiring connection you can go 2 ways.
1. Run a wire to a 12 volt LEAD ACID type small battery (like 5AH). Will not be the most mobile drill but should be back in service and will be mobile. (you may be able to jury rigg the original charger to charge the batt).
2. Run the wires to a LITHIUM ION drill battery of 12 volts. Add Velcro attachment to bottom of the drill to attach. For a battery and charger either purchase a 12 volt drill (cheap) or a battery and charger combo.
Don’t mess with NICAD. It’s not worth investing in. If you’re inventive you can find ways to run a cordless drill off anything. I have a new RIDGID brushless drill that has a velcro attachment where it can run off anyone else’s lithium batteries. Don’t limit the solution to the OEM battery!